
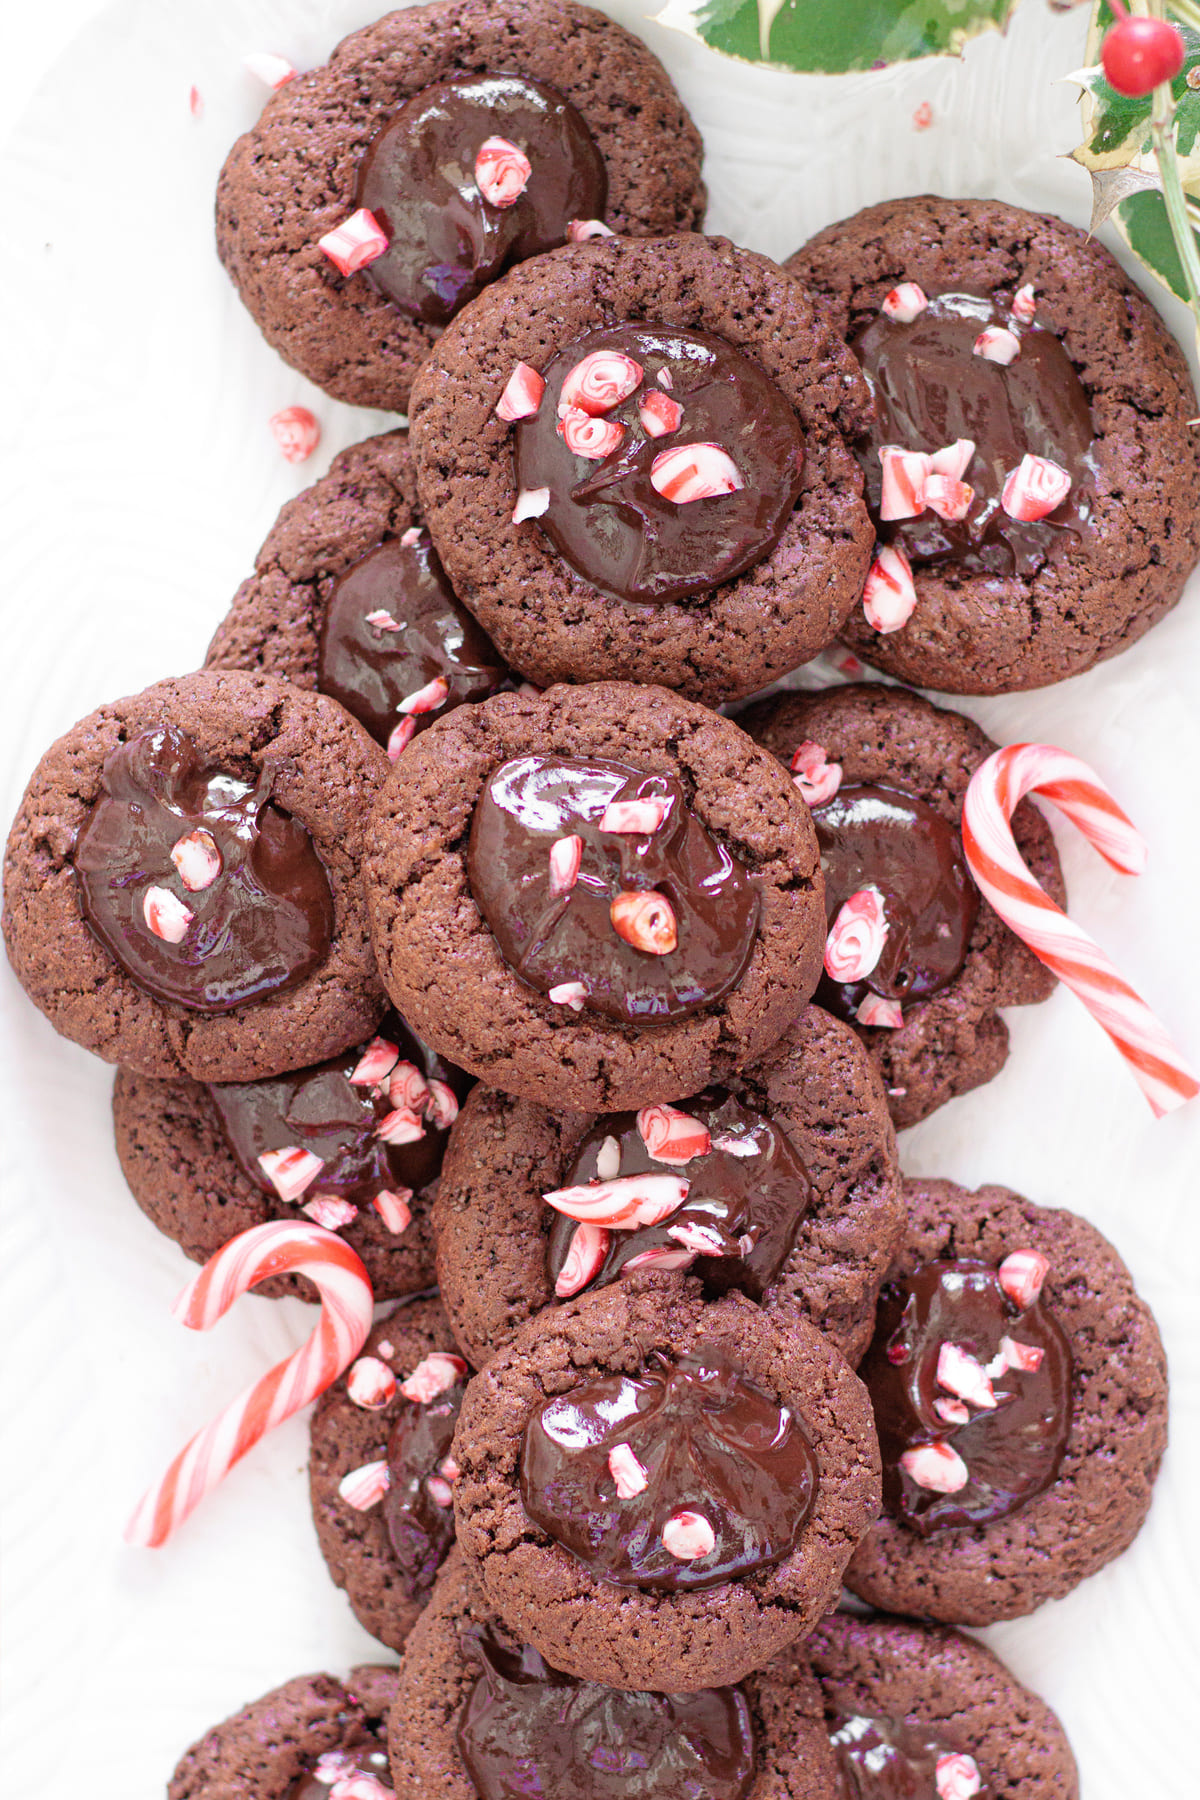
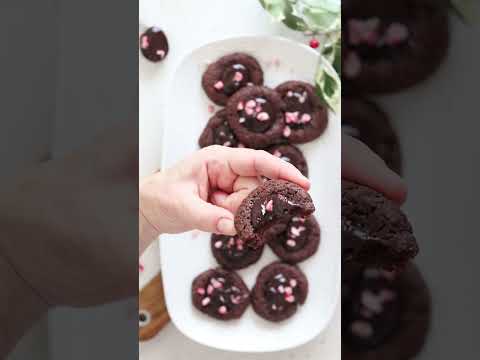
These Chocolate Peppermint Thumbprint Cookies are the one Christmas cookie I never skip. They’re soft, chewy, festive, and honestly so easy to make. No complicated steps, no fancy tools, just simple ingredients and that perfect mix of chocolate and peppermint that everyone loves.
Every year I make a huge batch for my family, and they disappear faster than anything else on the cookie tray. The chocolate cookie + chocolate ganache + crushed candy canes combo hits that perfect balance. Just be ready… you’ll end up making these every year from now on, haha!
I grew up with my mom baking these every single holiday, so honestly, we should all thank her for this recipe, haha!
They’re the kind of cookie you can’t just look at. Trust me, the whole tray disappears within minutes. You eat one… then somehow you’re reaching for a second (and a third…). They’re that good and genuinely addictive. Almost as good as Rita’s Snowball Cookies!
And the best part? They’re so simple to make, and you only need a handful of ingredients you probably already have in your pantry.
But if you’re looking for an even easier cookie that’s just as delicious, you should take a peek at Rita’s 3-Ingredient Cut-out Christmas Cookies.
What You’ll Need
This recipe gives me about 22 to 24 cookies, depending on how generous I get with the dough. For the holidays, I always double the batch. And honestly, I highly recommend you do the same, they vanish fast!
For the Cookies:
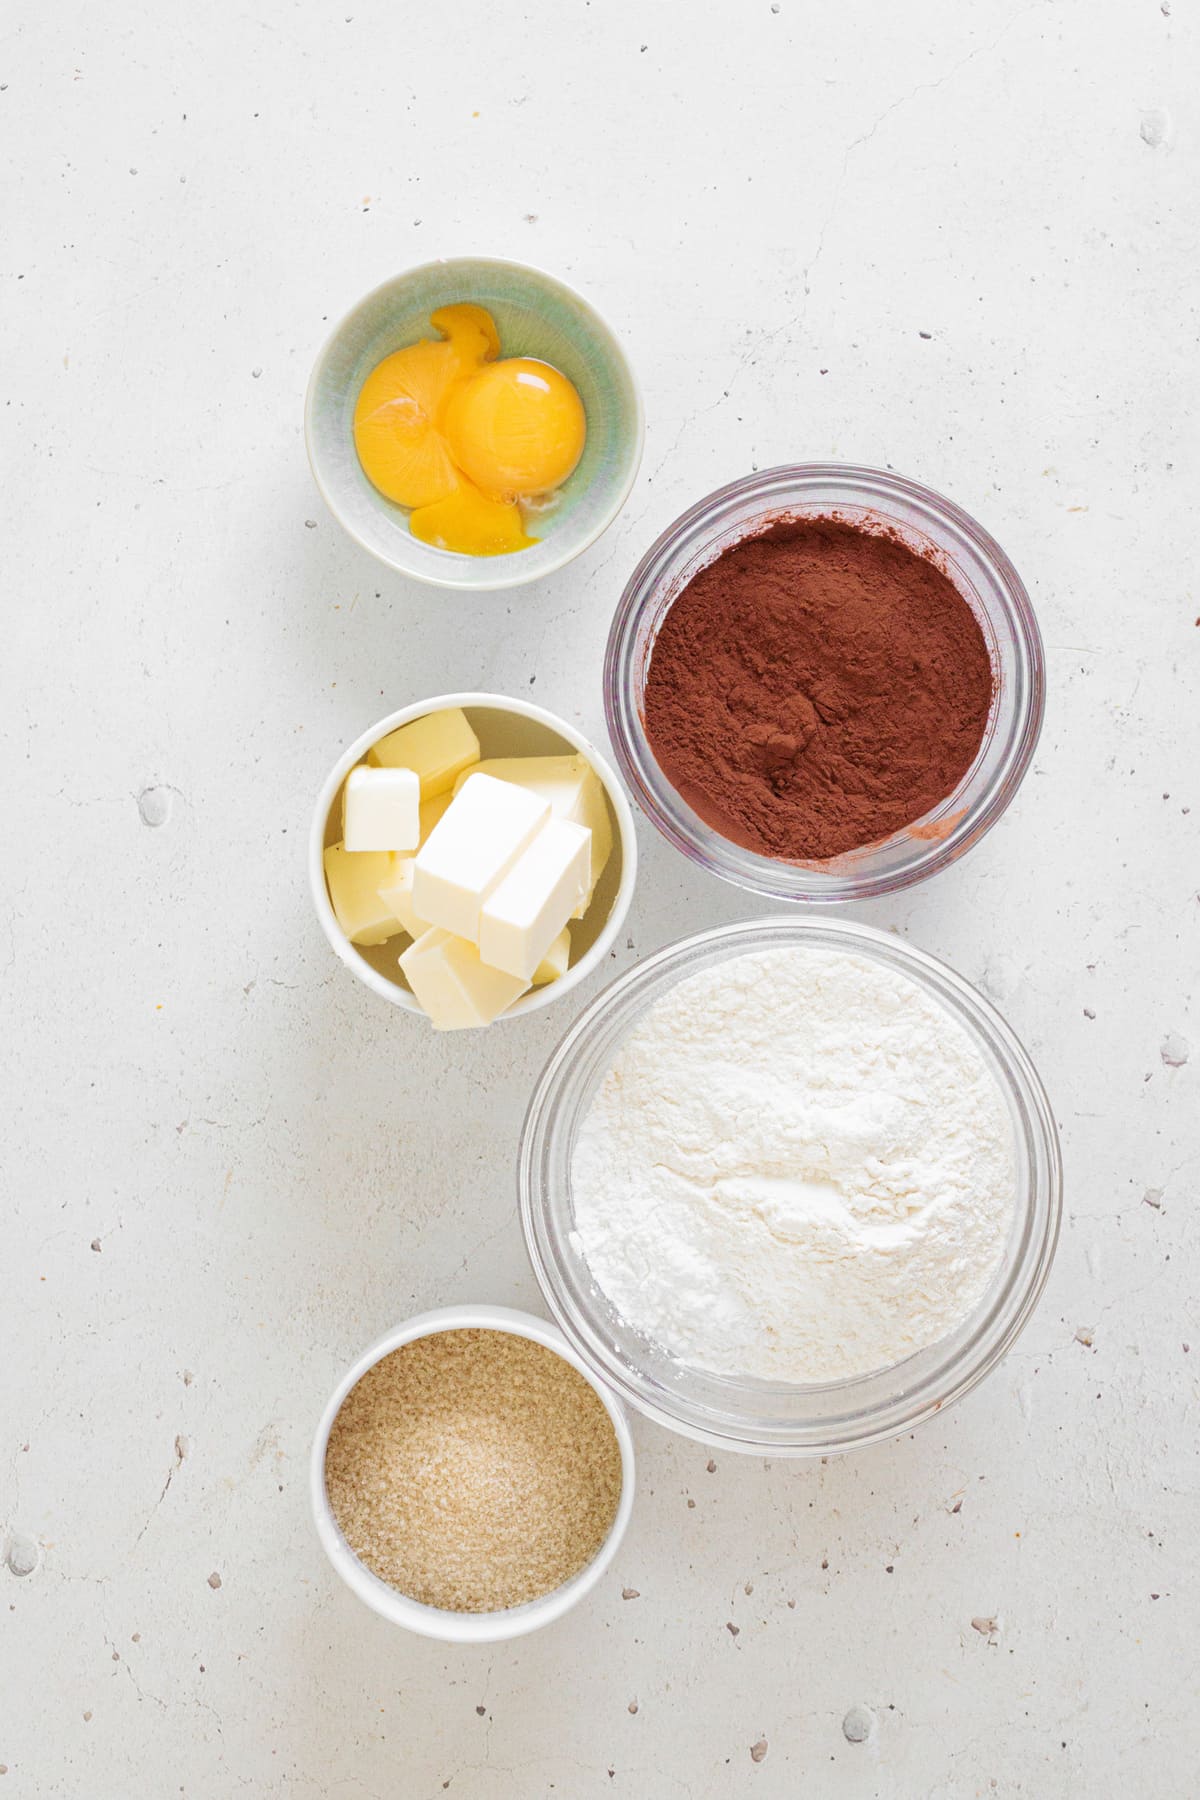
- 1 ½ cups all-purpose flour (190g) – I like to use King Arthur All-Purpose Flour. It gives the cookie a soft but sturdy structure. I’ve tried with cheaper flours but the dough always feels a bit sandy or uneven.
- ½ cup unsweetened cocoa powder (40g) – For that deep chocolate flavor, I either use Guittard Cocoa Rouge (if I’m feeling fancy) or Hershey’s Natural Unsweetened Cocoa Powder (which is cheaper!). Both have a high cocoa percentage, which gives the cookies that beautiful dark color.
- ½ teaspoon baking powder – Just be sure it’s fresh. Anything opened for more than 6 months won’t give the cookies a proper lift.
- ¾ cup unsalted butter, softened (170g) – It should be at room temperature. Make sure it’s truly “softened.” It should dent easily when pressed but not look greasy or melted.
- ½ cup light brown sugar (110g) – I usually use light brown sugar because it gives the cookies a touch more moisture and a subtle caramel note, but you can absolutely use regular white sugar too.
- 2 egg yolks, at room temperature – Room temperature yolks mix into the dough much more smoothly. Cold yolks make the butter mixture seize up a bit, so don’t skip this step!
For the Ganache:
- 1 ¼ cups dark chocolate chips (200g) – I like to use Ghirardelli 60% Dark Chocolate Chips (again, if I’m feeling fancy!) for the smoothest melt. But most of the time, I actually chop the Tony’s Chocolonely 70% Dark Chocolate Bar. Both melt beautifully for ganache.
- ½ cup heavy cream (120ml) – Any brand works as long as it’s real heavy cream (not “light cream”).
- 4 peppermint candy canes, crushed – Just make sure they’re fresh and not sticky. Older candy canes don’t crush cleanly!
Also, please don’t panic-shop! These are just my favorites, not strict rules. Thumbprint cookies aren’t divas, they taste great with pretty much anything. Now let’s actually make them. And if you’ve got extra candy canes lying around, use them to make my 3-Ingredient Peppermint Bark Clusters. You won’t be disappointed.
How to Make My Chocolate Thumbprint Cookies
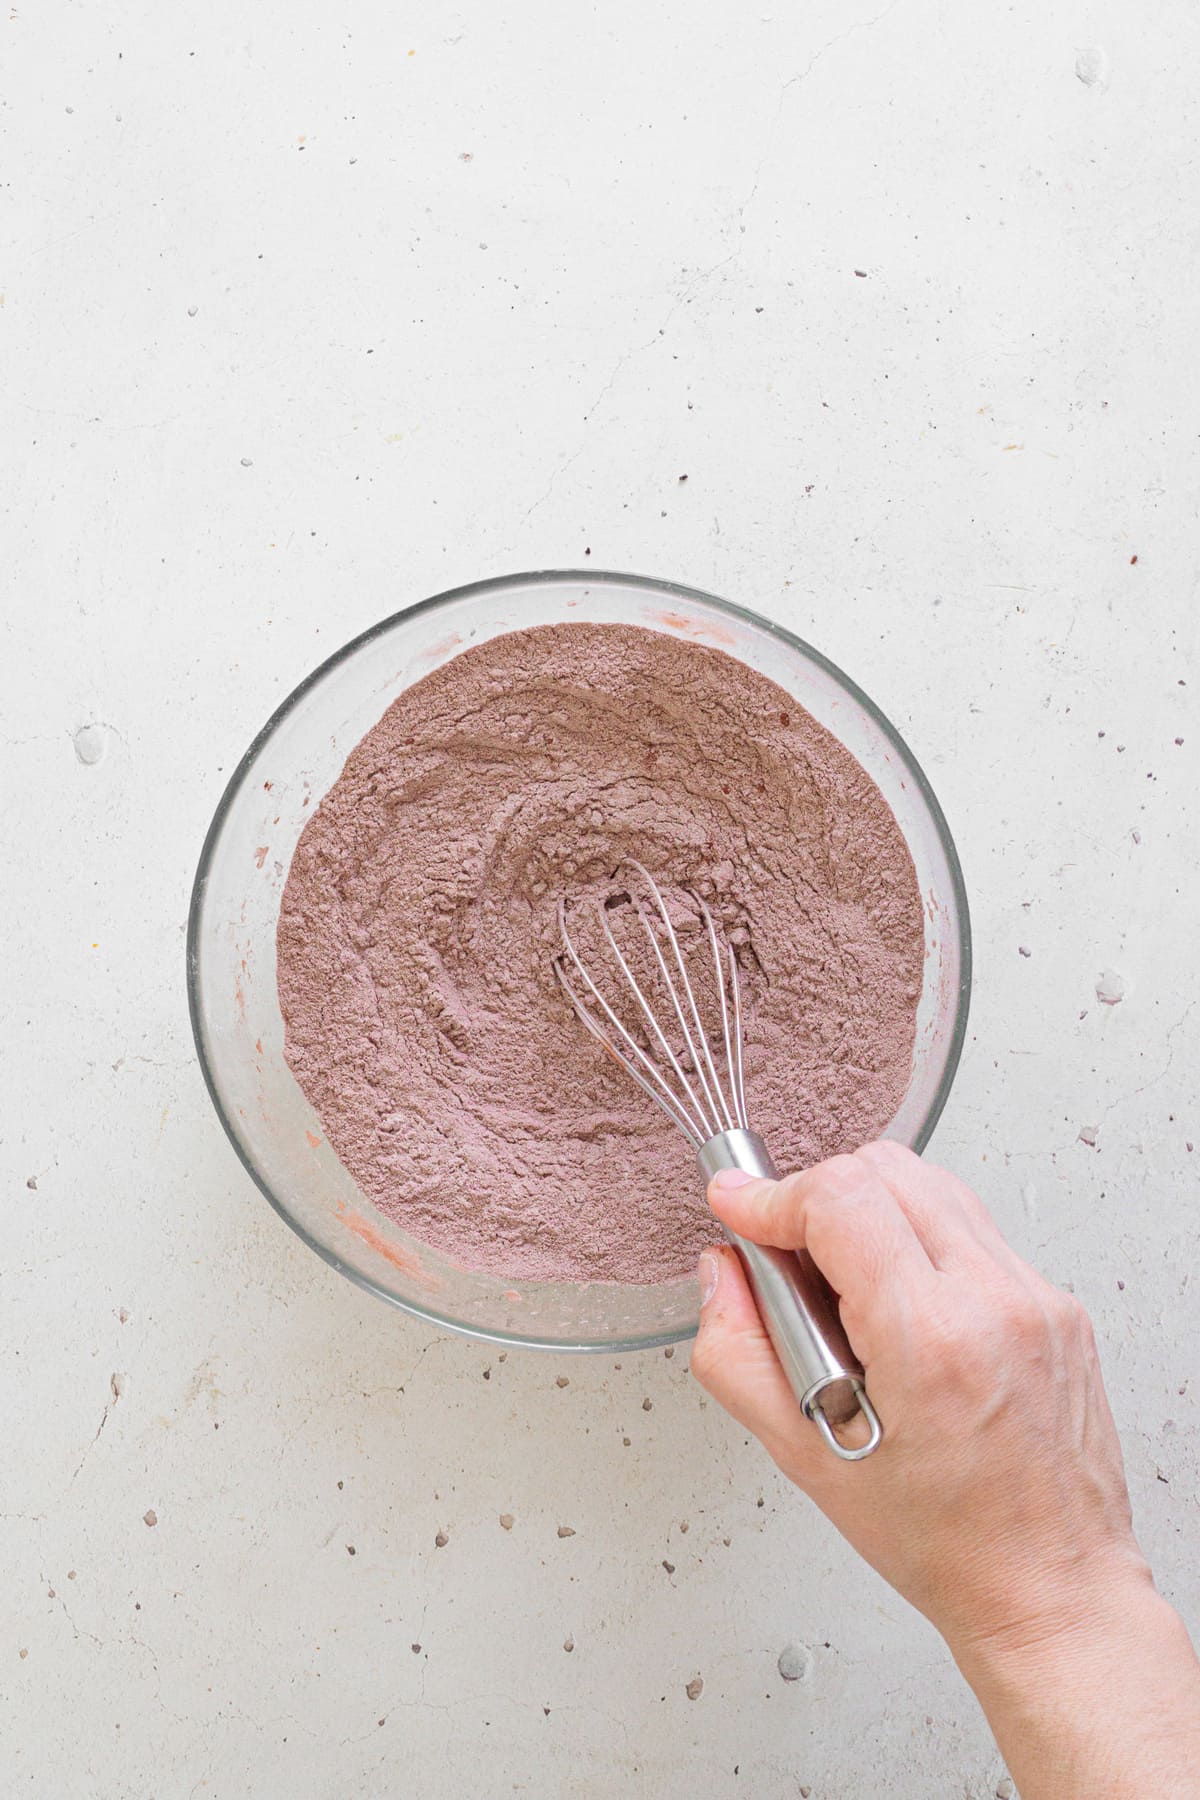
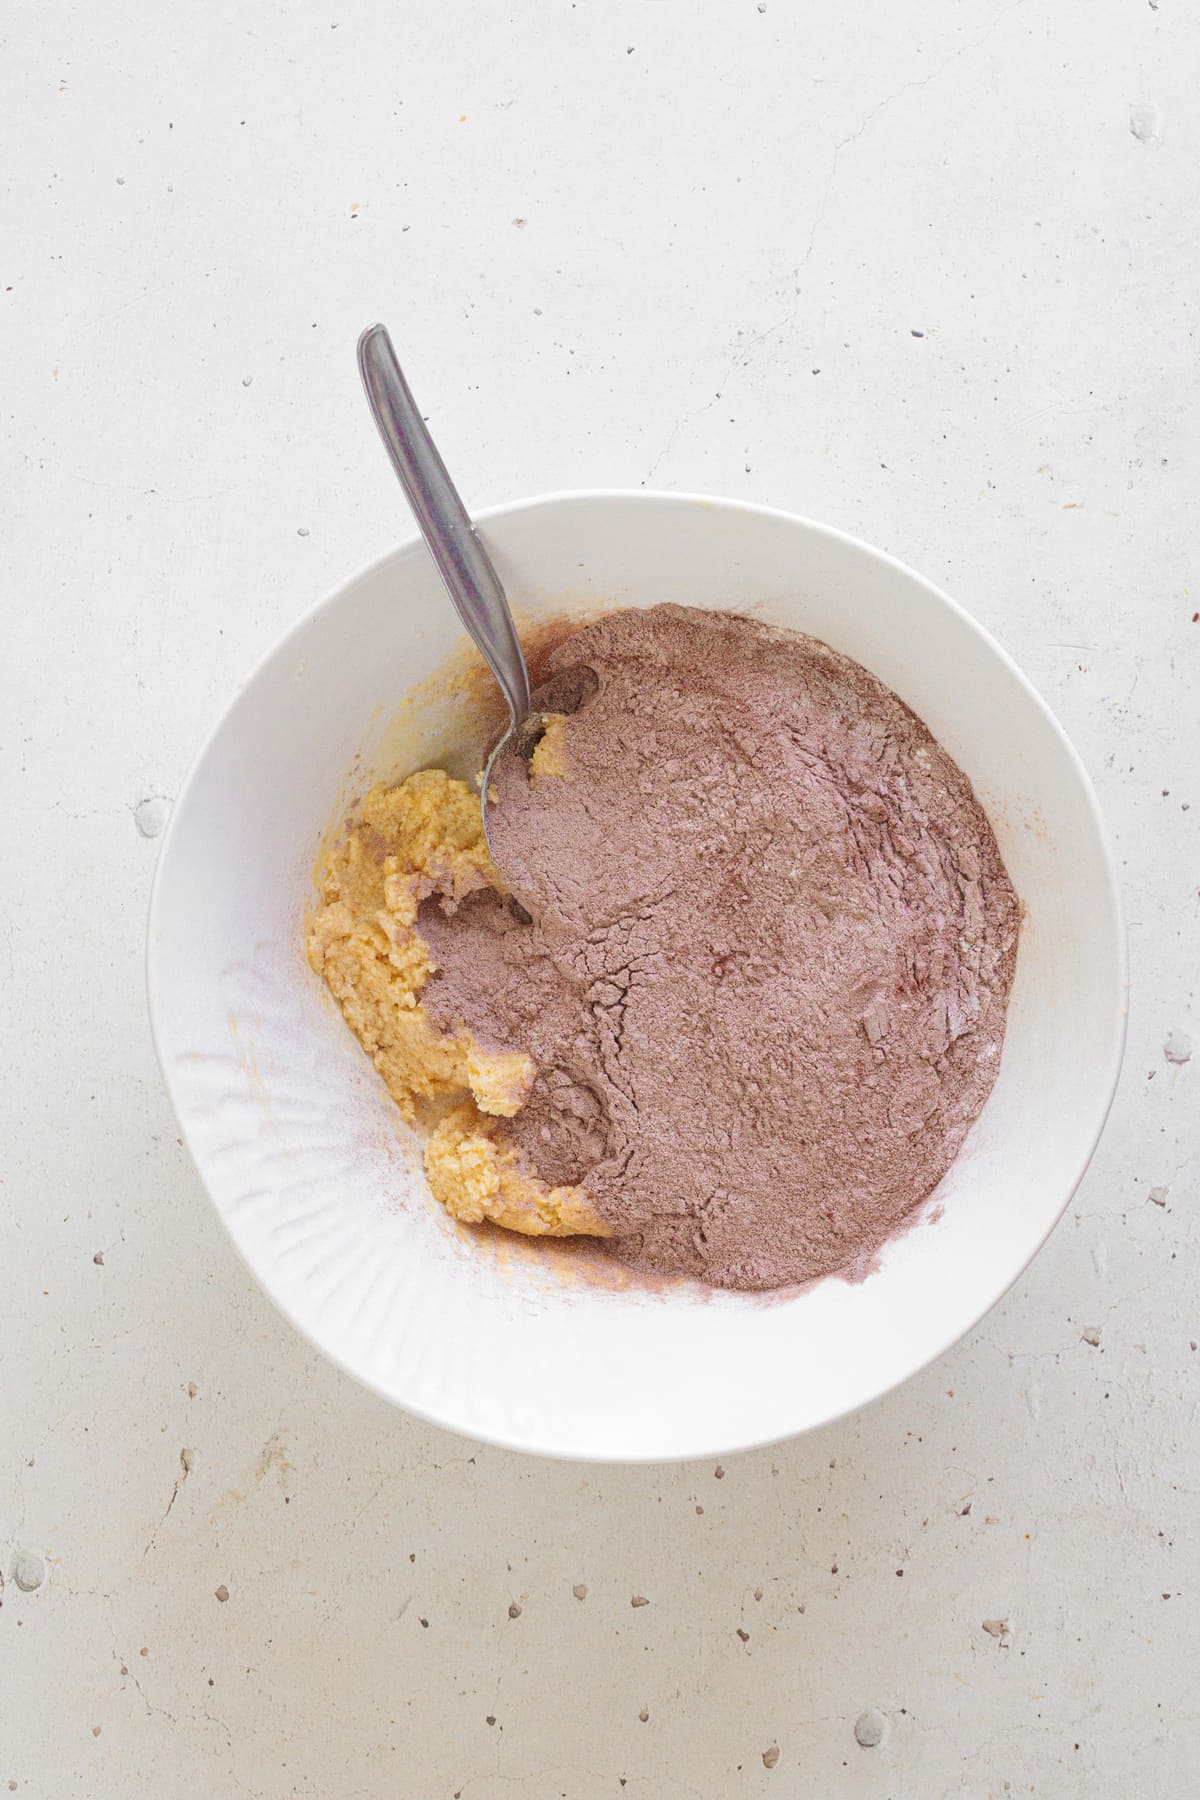
I start by lining two baking trays with parchment paper and setting them aside. Then, I grab a medium bowl and sift in the flour, cocoa powder, and baking powder. I whisk everything together and set aside.
Mixing the dry ingredients first helps to ensure everything stays evenly distributed later. Cocoa powder especially loves to clump, so whisking it really well at this stage saves me from overmixing once I combine it with the wet ingredients. This little (yet very important) step keeps the dough tender and the cookies from turning dense.

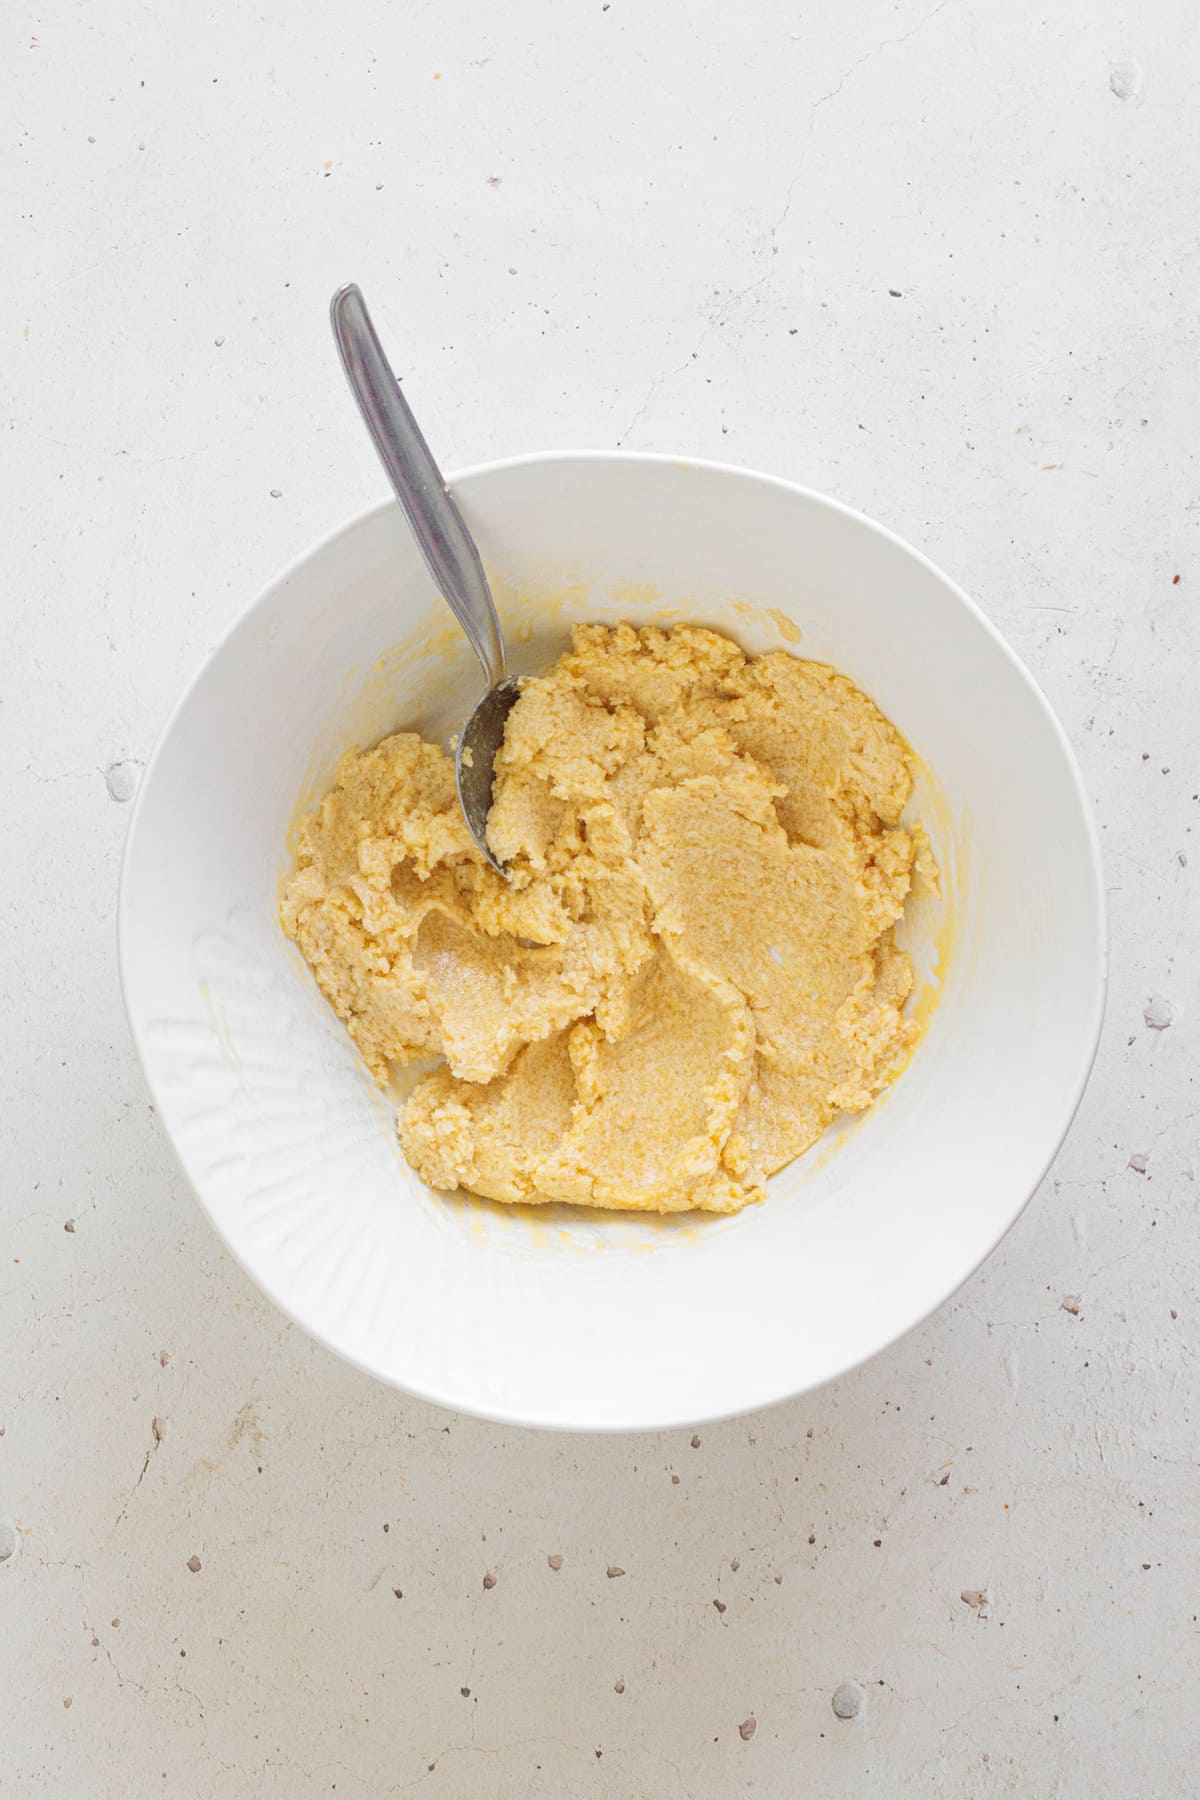
In a separate bowl, I add the softened butter and sugar. The butter should be at room temperature (it should dent easily when pressed but not look greasy). Then, using a spoon or a sturdy spatula, I just mash everything together until it looks creamy.
I don’t recommend using a mixer for this! I know it’s easier and takes less time, but I feel like it makes this mixture too runny (which messes with the whole dough texture).
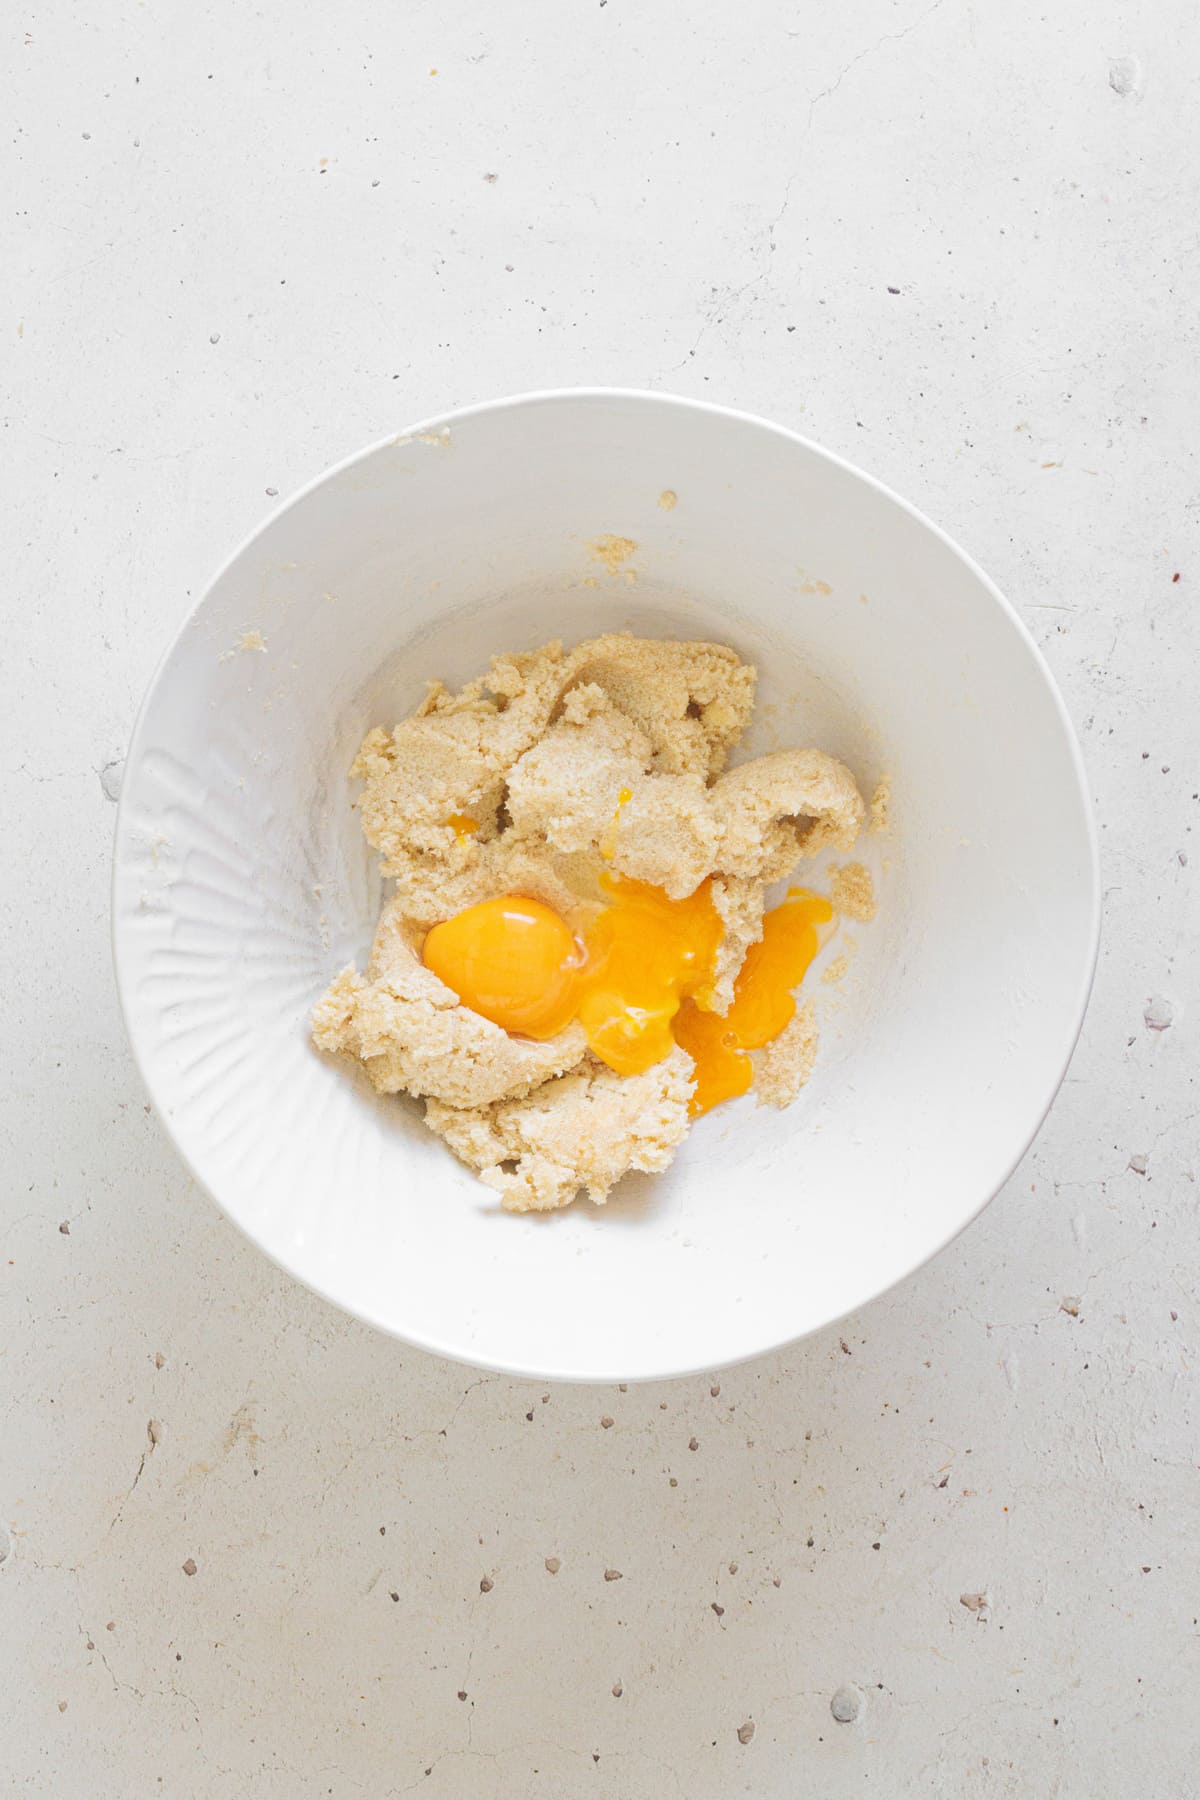
Once the butter and sugar look like a paste, I add the egg yolks. Now, using the same spoon I keep mashing everything really well until the dough becomes a little lighter in color and starts looking almost silky. This step is important because the yolks give the cookies richness and help bind the dough together, so I make sure they’re fully incorporated.
Now, I gradually add the dry mixture we made before. Don’t add it all at once. I did it once and not only was it harder and took longer to mix but I also managed to puff the powder everywhere around me, haha!
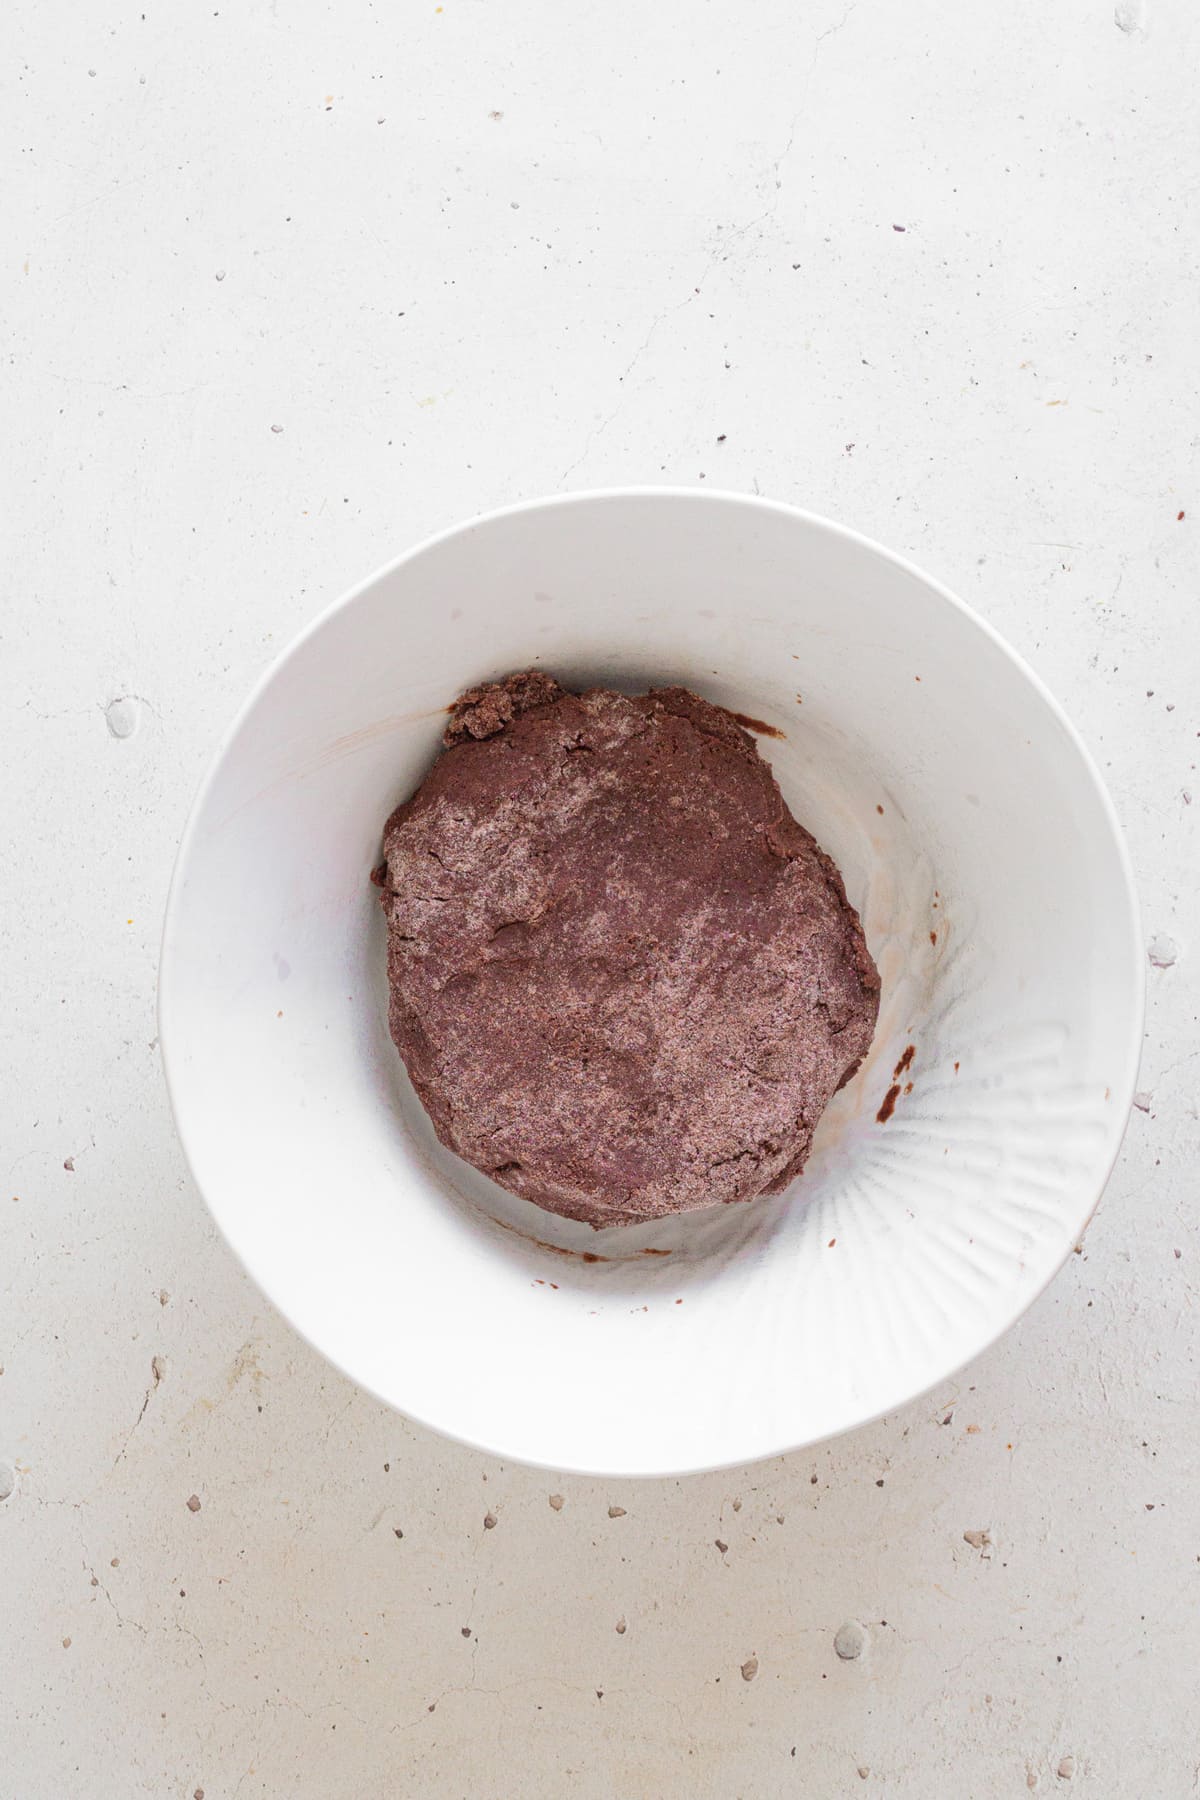
I usually add it divided into 4 portions. The first two portions I stir with a spoon or a spatula, but once the dough starts to come together I like to use my hands. Using my hands also warms the dough just a tiny bit, which helps the butter soften and makes everything bind together more smoothly.
I “squeeze” the dough together with my hands and fold it over itself until it forms a ball. It feels a bit sandy at first but it turns into a soft, compact dough. That’s when I know it’s ready.
Now comes the fun part, shaping the cookies (at least for me!). Using a teaspoon, I scoop small dough portions and roll them into balls. Using a spoon helps me make them all roughly the same size so they bake evenly.
I place each ball in the lined baking trays and press the center of each one with the back of the teaspoon I just used to create a small indentation. You can also use your thumb (after all they’re known as thumbprint cookies, haha!). But I find the spoon gives me a cleaner shape and keeps them from cracking too much around the edges.
I used to bake my cookies right away and they always spread and lost that nice thumbprint shape. So, now I’m going to share with you the secret trick for the perfect thumbprint cookie my mom taught me!
Before baking, I always chill the shaped cookies for at least an hour. Trust me, it makes such a HUGE difference. It helps them hold their structure so you get that perfect little well in the center.
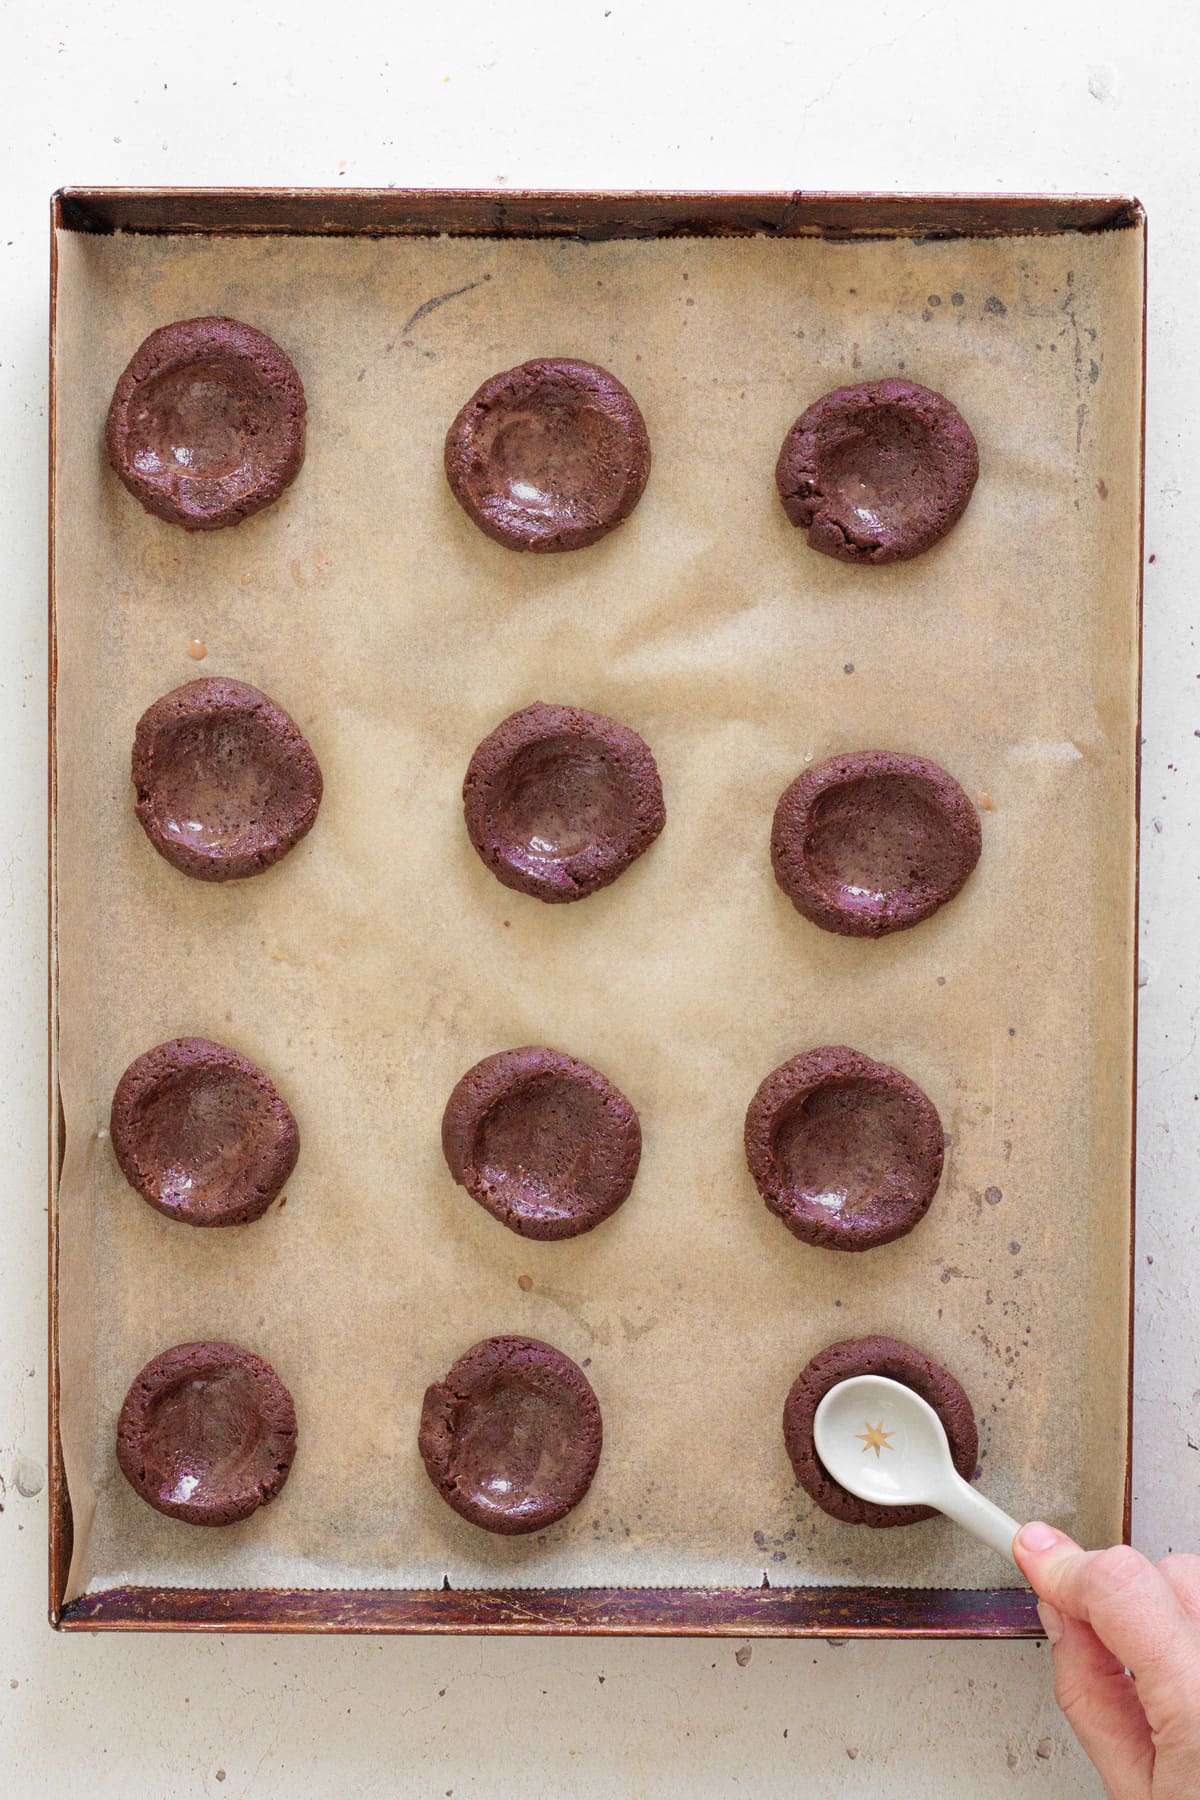
Once the cookies have chilled in the fridge for about an hour, I preheat my oven to 350°F. I bake them for about 10 to 12 minutes, just until they’re set but still soft. The tops should look matte, not shiny.
Make sure the cookies are spaced out on the tray so the heat can circulate evenly around them. This helps them bake uniformly and keeps the edges from touching as they puff slightly in the oven.
Sometimes, while they’re baking, they puff up a little in the oven and the indentation almost disappears, that’s totally normal! If it has disappeared, I gently press the centers again with the back of the same teaspoon while they’re still warm. If you wait for them to cool down, the cookie hardens and you won’t be able to make the indentation smooth and deep enough to hold the ganache later.
Another quick secret my mom taught me was to use a round cookie cutter and swirl it around each cookie to “tidy up” the edges. That’s how I get these extra neat looking cookies. It’s not essential, but they look better for photos or gifting.
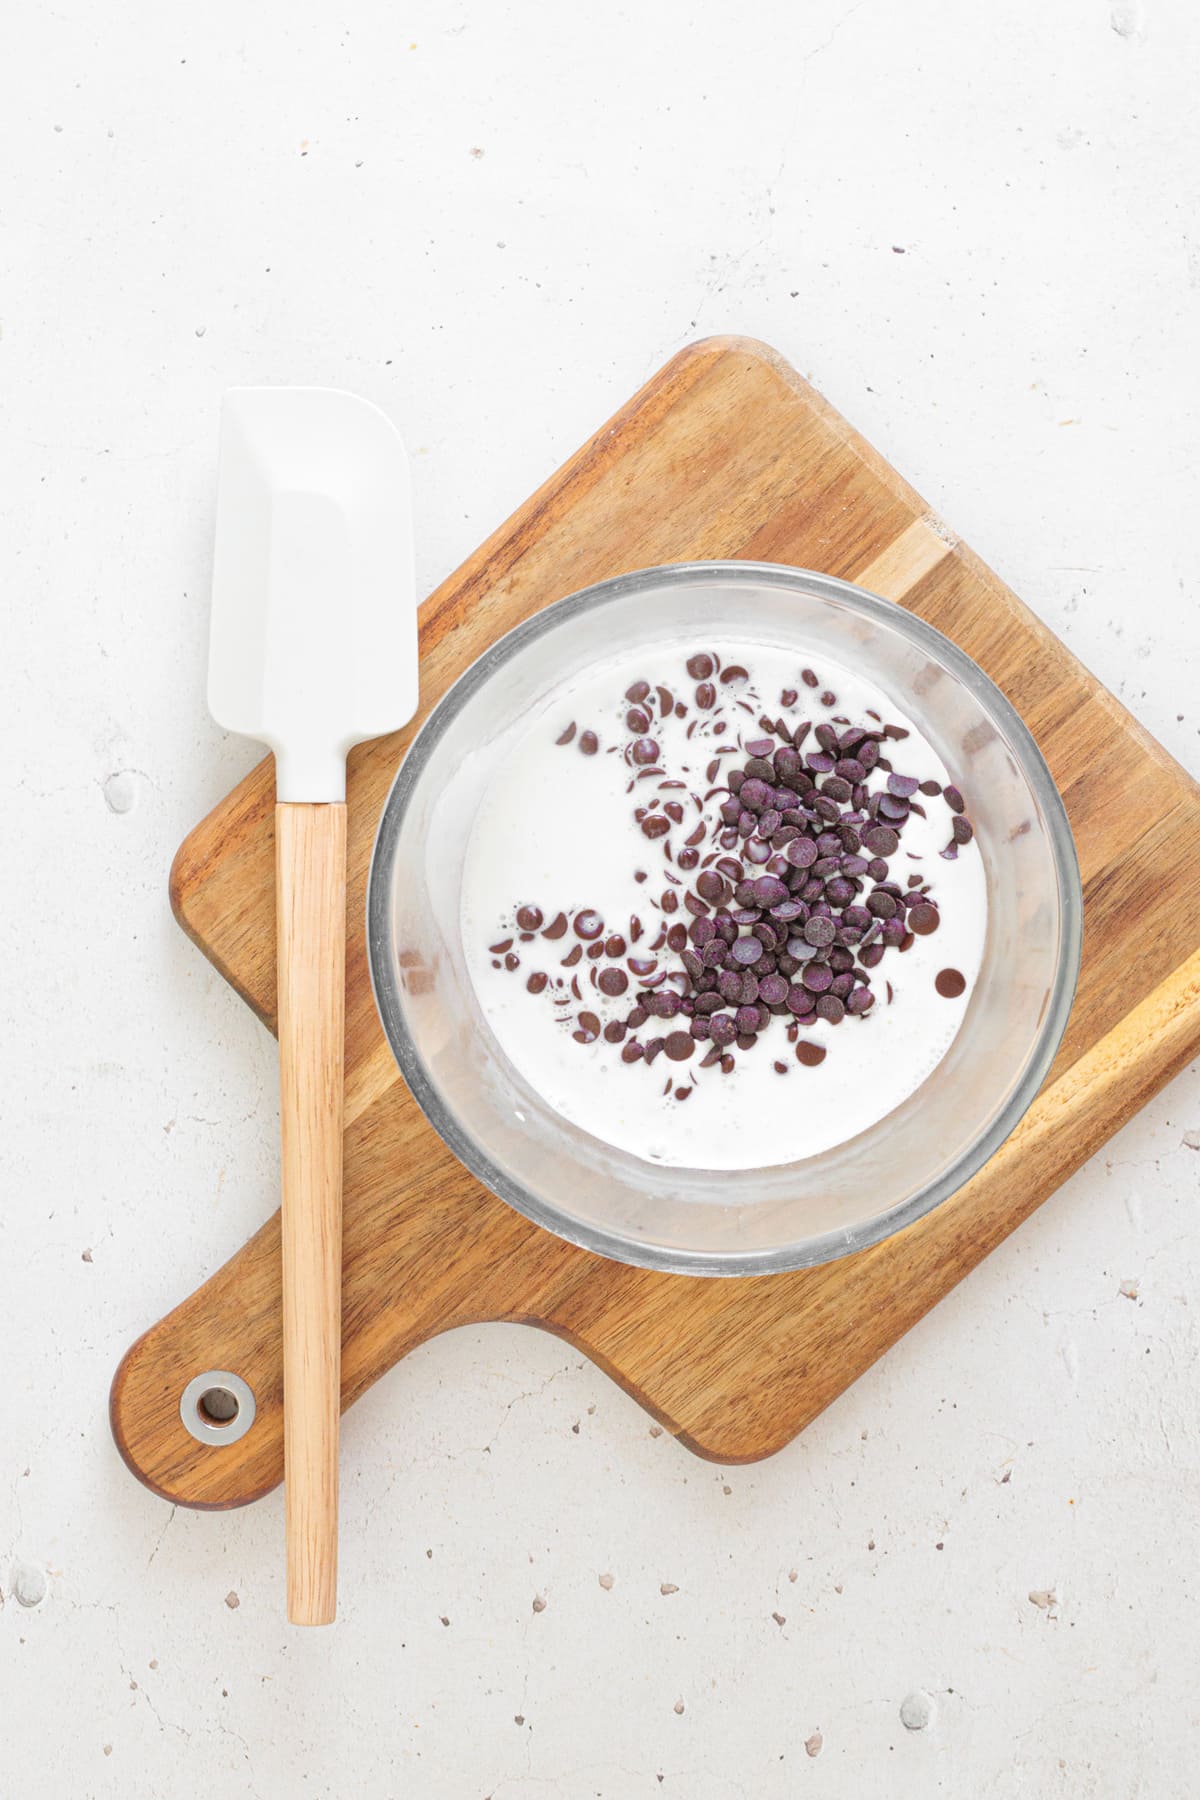
While the cookies chill, I make the ganache. I heat the heavy cream in a small saucepan until it’s just about to boil.
Then, I pour it over the chocolate chips and let them sit for a minute before stirring. This helps to melt the chocolate more gently, and the ganache turns out smoother. Use a spoon or a fork to stir. I’ve tried a whisk, but it traps too much ganache inside the wires and makes a mess.
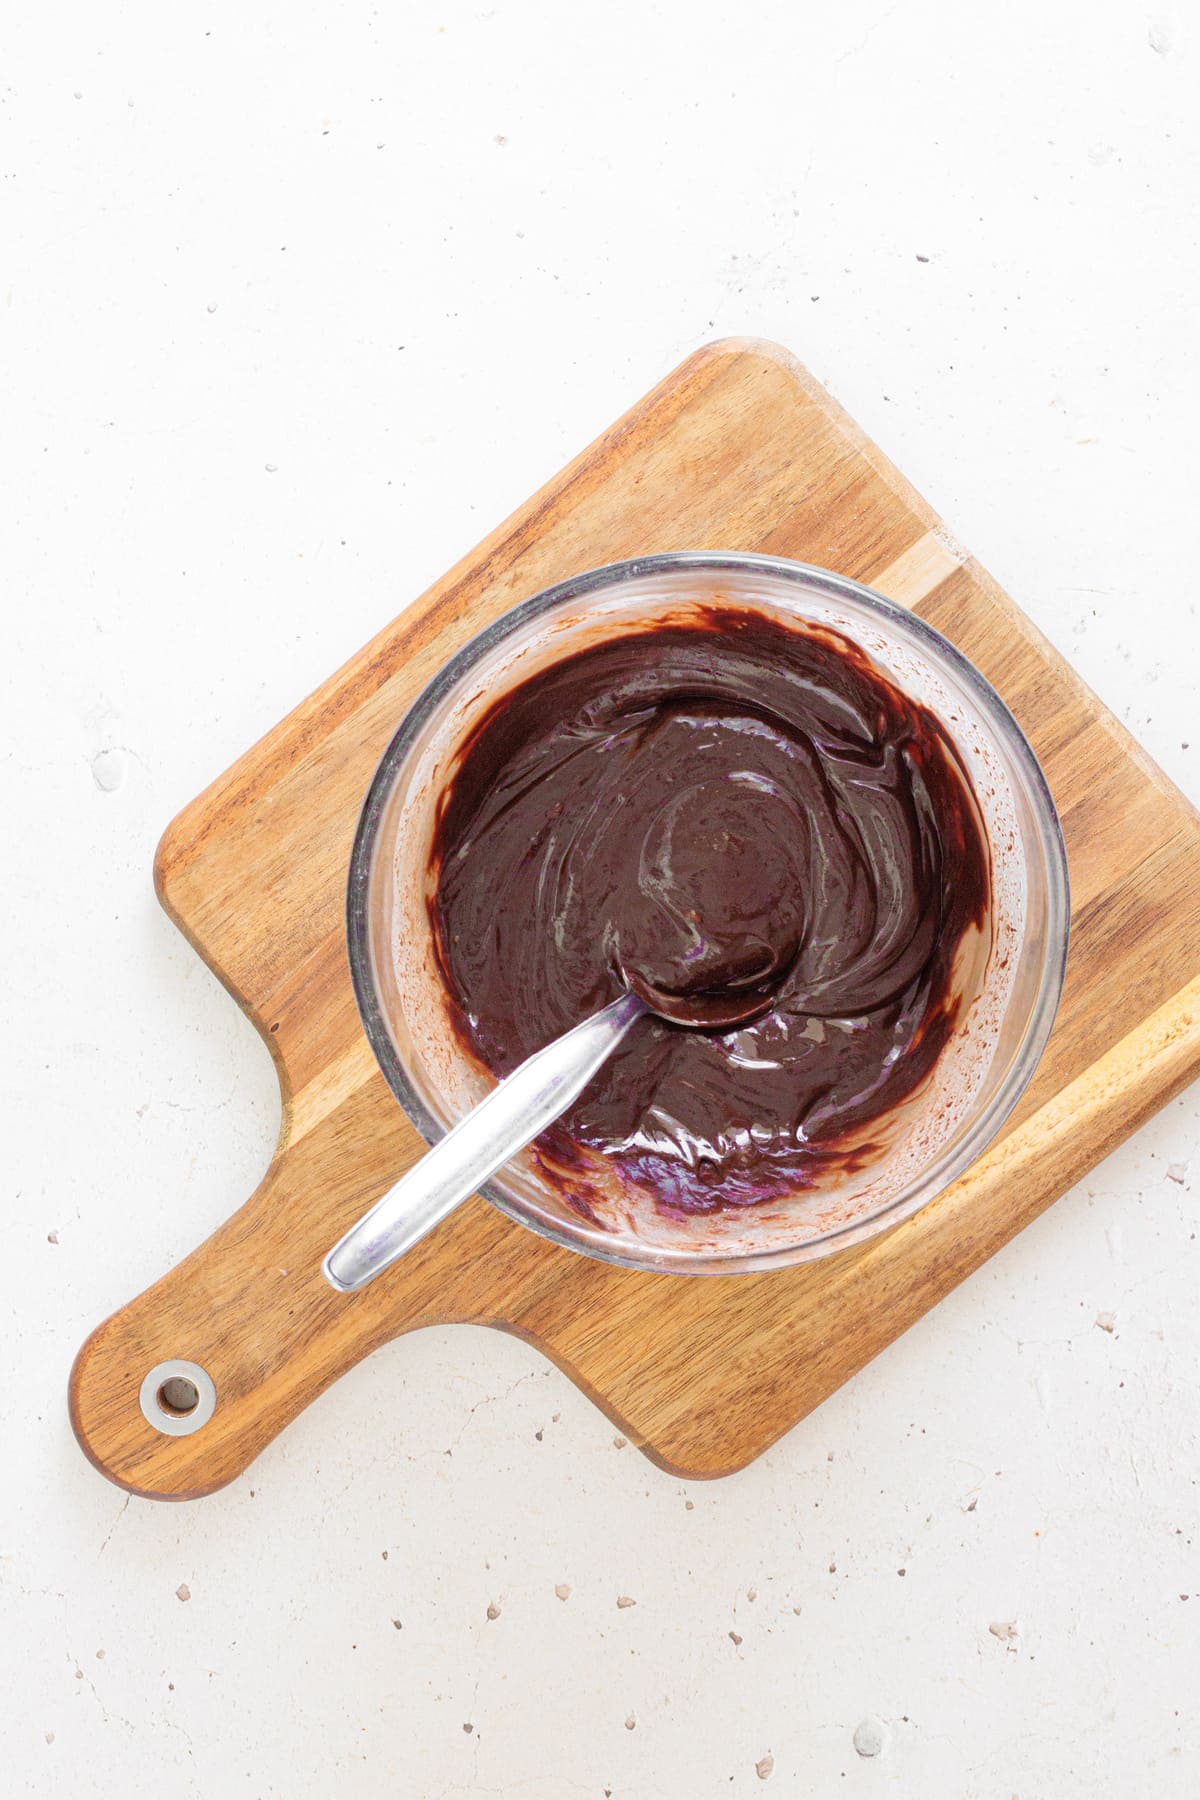
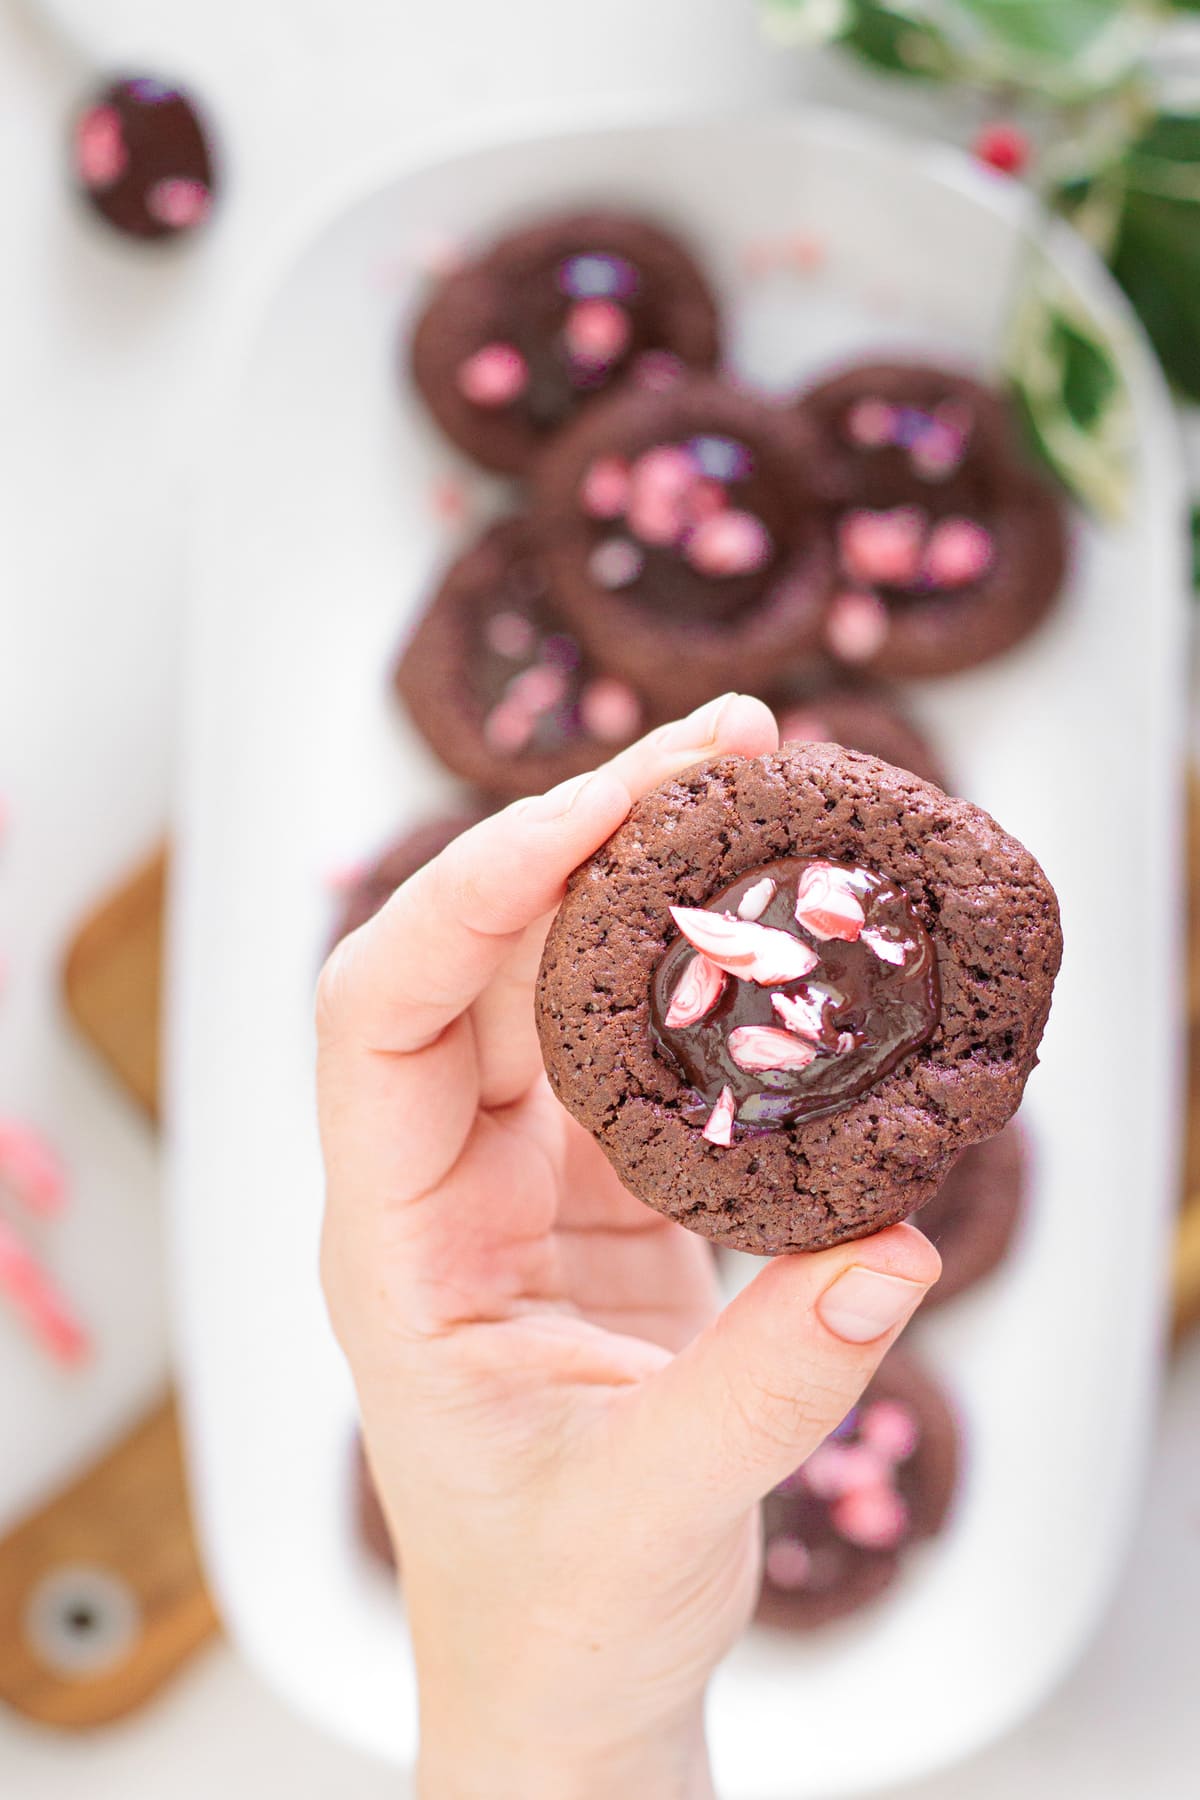
Once the cookies have cooled completely, I add about 1 teaspoon of ganache into each indentation. Don’t overfill them, or it’ll spill over the edges (been there, done that!).
Then, I sprinkle crushed candy canes on top. Don’t wait for the ganache to fully set, or the little peppermint pieces won’t stick.
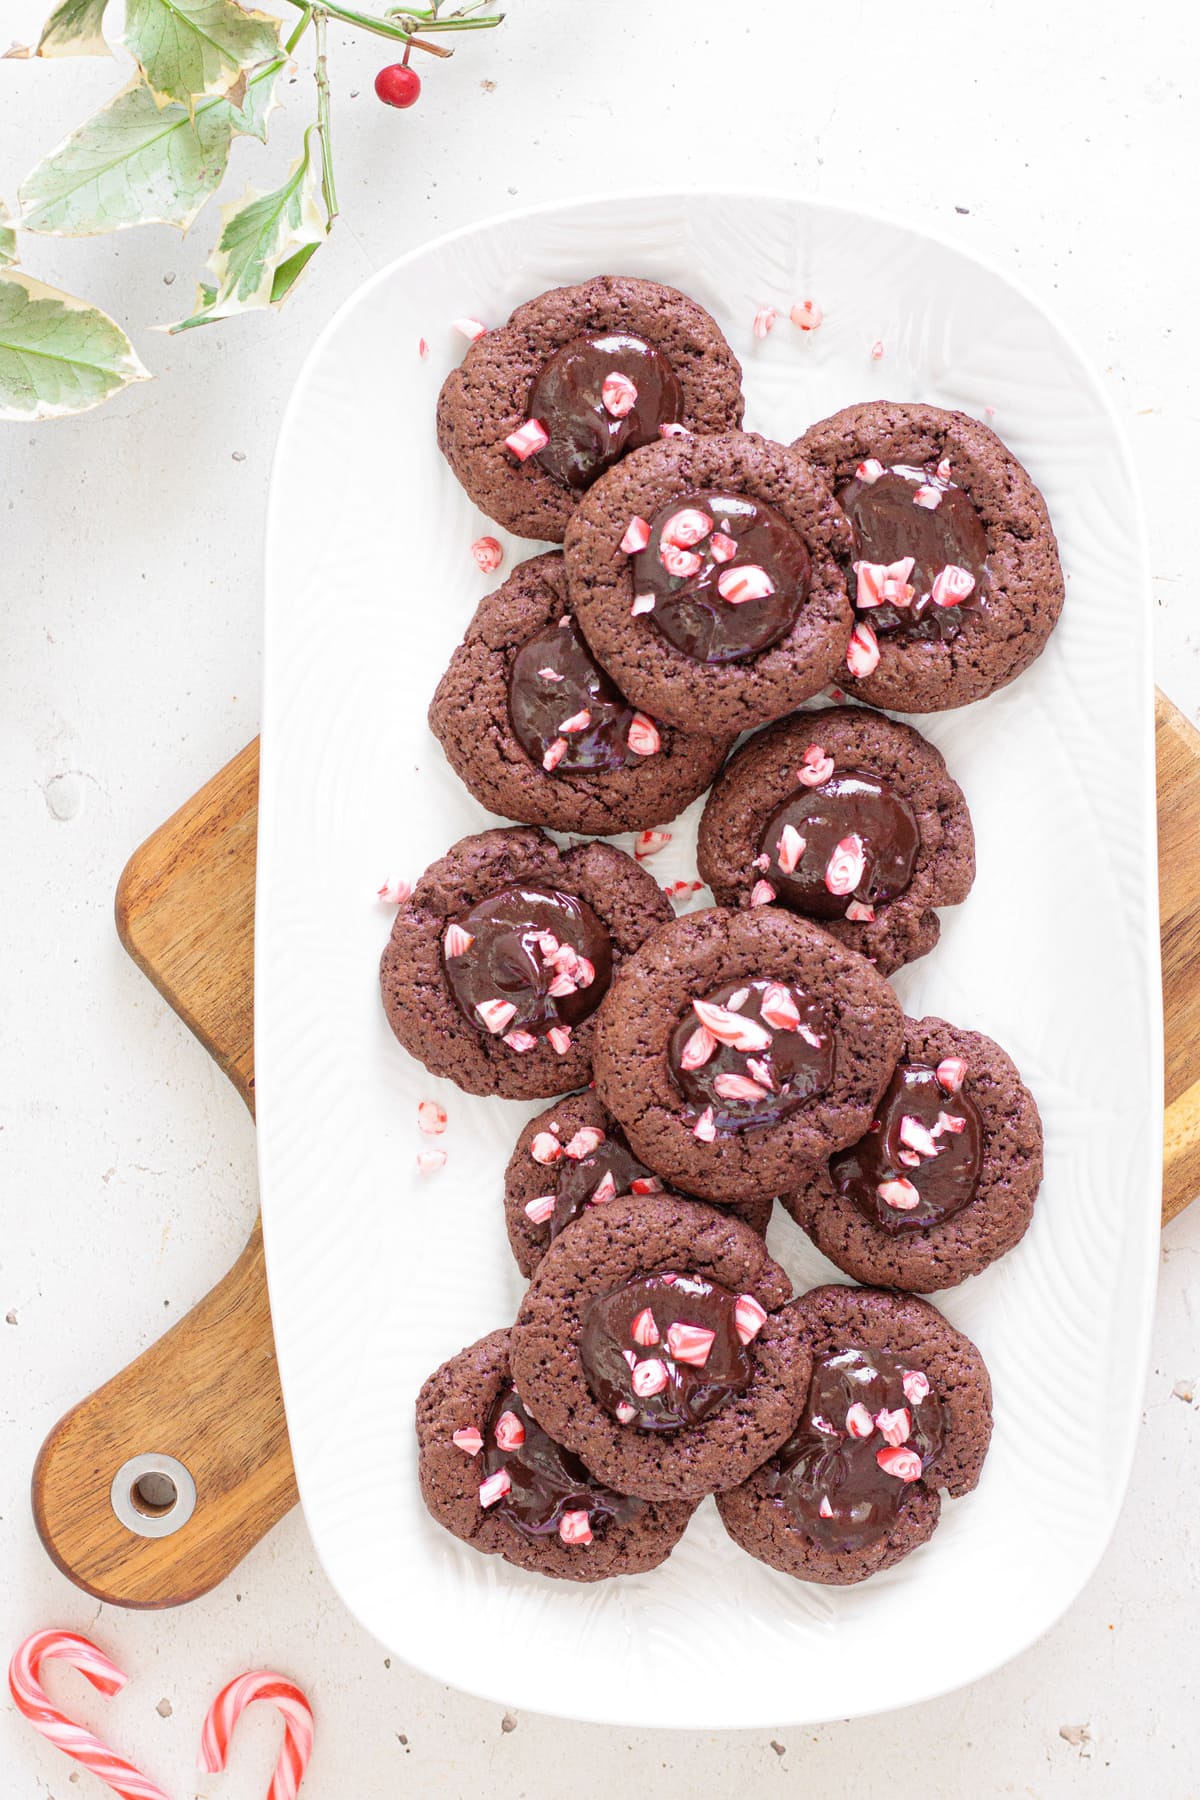
Wait! We don’t eat them right away (I might sneak one or two, shhhhh…). I like to pop the tray into the fridge for 10 to 15 minutes. This helps firm up the ganache so the cookies are easier to store and stack without smudging.
And now the hardest part… Trying not to eat the whole plate! These are soft, creamy, and delicious.
My mom always says these cookies taste even better the next day. My mom keeps them in an airtight container and says they taste just as good for up to 3 days. If you leave them out uncovered, the ganache starts to dry on top! So sealing them really helps maintain that silky center.
But I wouldn’t know… they’ve never survived that long in my house. I’m not kidding when I say they don’t last longer than a day! Even during the holidays, no matter how many batches I make, they disappear. I swear my family smuggles them in their pockets to take home, haha!
And if you love these chocolate cookies, you have to try Rita’s Chocolate Bonbon Cookies. Trust me, they are so good!
Variations I’ve Tried And Loved
If you’ve made one of my recipes before, you know I usually go for the classic versions, and this one is no different. But I did test a few variations that turned out almost as good as the classic! The best part is that they’re all still super easy.
- Milk chocolate ganache – For a sweeter cookie, I’ve swapped the dark chocolate chips for milk chocolate. The ganache turns out extra creamy and smooth, almost like a soft fudge.
- White chocolate ganache – My mom is a white chocolate lover, so I actually tried this variation just for her. I use white chocolate to make the ganache. The contrast of the soft vanilla flavor with the crunchy peppermint is amazing. She loves this one!
- Nutella filling – One day I was feeling a bit lazy so I filled the thumbprints with a little dollop of Nutella. This is actually the variation I make the most and it disappears just as fast at family gatherings! So, if you want to avoid washing an extra saucepan, go for this one.
- Gluten-free – I’ve also made these gluten-free for my cousin Claudia (who has a gluten intolerance), and they turned out just as delicious! I use King Arthur Measure-for-Measure Gluten-Free Flour and keep everything else exactly the same. The cookies come out a tiny bit softer, but the flavor is spot on.
If you’re in the mood to experiment, go for any of these! The base recipe is so foolproof that all these variations turn out great without any extra effort.
Mistakes To Avoid When Making My Chocolate Thumbprint Cookies
Even though this recipe is super simple, there are a few little things that can totally change the texture or shape of your cookies. Here are the mistakes I’ve made (yes… all of them!) so you don’t have to.
- Not chilling the dough long enough – This was the mistake I made again and again, until my mom warned me about it. I used to skip the chilling time and the cookies would spread a lot in the oven and lose their thumbprint shape. They still tasted great, but they didn’t look like thumbprints at all.
- Using butter that’s too soft or melted – I once forgot to take the butter out of the fridge, so I thought melting it in the microwave would give me the same effect. NOPE! The dough was greasy and loose, so the cookies spread wide and turned flat. Your butter should be soft enough to dent with a finger, but not shiny or starting to melt.
- Overfilling the indentation with ganache – This one is tempting, I know, I did it! After all what could happen with adding more ganache besides them being more delicious?! The ganache spilled over the sides as soon as I took a bite (Warning: big mess!) and I had stacked them, so every cookie every cookie was a mess to grab!
- Not reshaping the wells after baking – The centers usually puff up in the oven, which is totally normal. But if you don’t press them down again while they’re still warm, you won’t be able to fix the wells once they’ve cooled. The cookie firms up quickly, and the indentation becomes way too shallow to hold the ganache.
- Baking the cookies until they look “done” – Cookies should still look soft when they come out. If you wait for the tops to look firm, they’ll be dry once cooled. They set as they rest.
Learn from my baking chaos so you can enjoy the perfect batch on your first try. No flat, funny-looking cookies like my early ones!
I hope these Chocolate Peppermint Thumbprint Cookies become a new tradition at your holiday table too. They’ve definitely earned a permanent spot on ours, and it wouldn’t feel like Christmas without them!
And if you want another ridiculously easy holiday treat, don’t miss Rita’s 3-Ingredient Gingerbread Truffles. They’re also dangerously addictive.
Note: All product mentions are simply what I use in my own kitchen. None of the links are sponsored or affiliate.


Chocolate Thumbprint Cookies
Description
Soft chocolate cookies filled with chocolate ganache and topped with crushed candy canes. These Chocolate Peppermint Thumbprint Cookies are festive, easy to make, and guaranteed to disappear from your holiday table.
Ingredients
For the cookies
For the ganache
Instructions
-
Prep the Pans & Dry Ingredients
Line 2 baking sheets with parchment paper. In a medium bowl, sift together the flour, cocoa powder, and baking powder, then whisk until well combined. -
Cream the Butter and Sugar
In a separate large bowl, add the softened butter and sugar. Using a spoon or sturdy spatula, mash and mix until the mixture looks creamy and well combined. -
Add the Egg Yolks
Add the egg yolks to the butter mixture and mix until the mixture becomes lighter in color and looks smooth and silky. -
Combine Dry and Wet Mixtures
Gradually add the dry mixture in about 4 portions. Stir the first additions with a spoon or spatula, then switch to your hands once the dough starts coming together. Gently press and fold the dough until it forms a soft, compact ball. -
Shape the Thumbprint Cookies
Using a teaspoon, scoop small portions of dough and roll them into balls. Place them on the prepared baking sheets and press the center of each ball with the back of the teaspoon to create a small indentation. -
Chill and Bake
Chill the shaped cookies on the trays in the fridge for at least 1 hour. When ready to bake, preheat the oven to 350°F (180°C). Bake for 10 to 12 minutes, until the cookies are set but still soft. If the centers puffed up, gently press the indentations again while the cookies are still warm.
-
Make the Ganache
While the cookies cool completely, heat the heavy cream in a small saucepan until it’s just about to boil. Pour it over the dark chocolate chips or chopped chocolate and let sit for 1 minute, then stir until smooth and glossy. -
Fill, Decorate, and Set
Spoon about 1 teaspoon of ganache into each cooled cookie indentation. Sprinkle with crushed candy canes. Chill the cookies for 10 to 15 minutes to help the ganache firm up slightly, then store in an airtight container.
Nutrition Facts
Servings 24
- Amount Per Serving
- Calories 163kcal
- % Daily Value *
- Total Fat 10.4g16%
- Saturated Fat 6.2g31%
- Cholesterol 36mg12%
- Sodium 19mg1%
- Potassium 85mg3%
- Total Carbohydrate 18g6%
- Dietary Fiber 1.3g6%
- Sugars 10.3g
- Protein 2g4%
* Percent Daily Values are based on a 2,000 calorie diet. Your daily value may be higher or lower depending on your calorie needs.