Four ingredients and five minutes… that’s all you need to make my 5 Minute Fantasy Bars. They’re unbelievably easy, completely no-bake, and have that perfect fudge-like consistency with a rich chocolate flavor. And the combination of chocolate, peanut butter swirls, and mini marshmallows? Pure joy in bite-size form!
They also happen to be naturally gluten-free, which is always a bonus when you're serving a crowd.
I make these all year long, but they’ve also taken a permanent spot on our holiday table for the past six years! You know they're that good when they stay on the menu for that long. So let me show you how simple they really are to make.
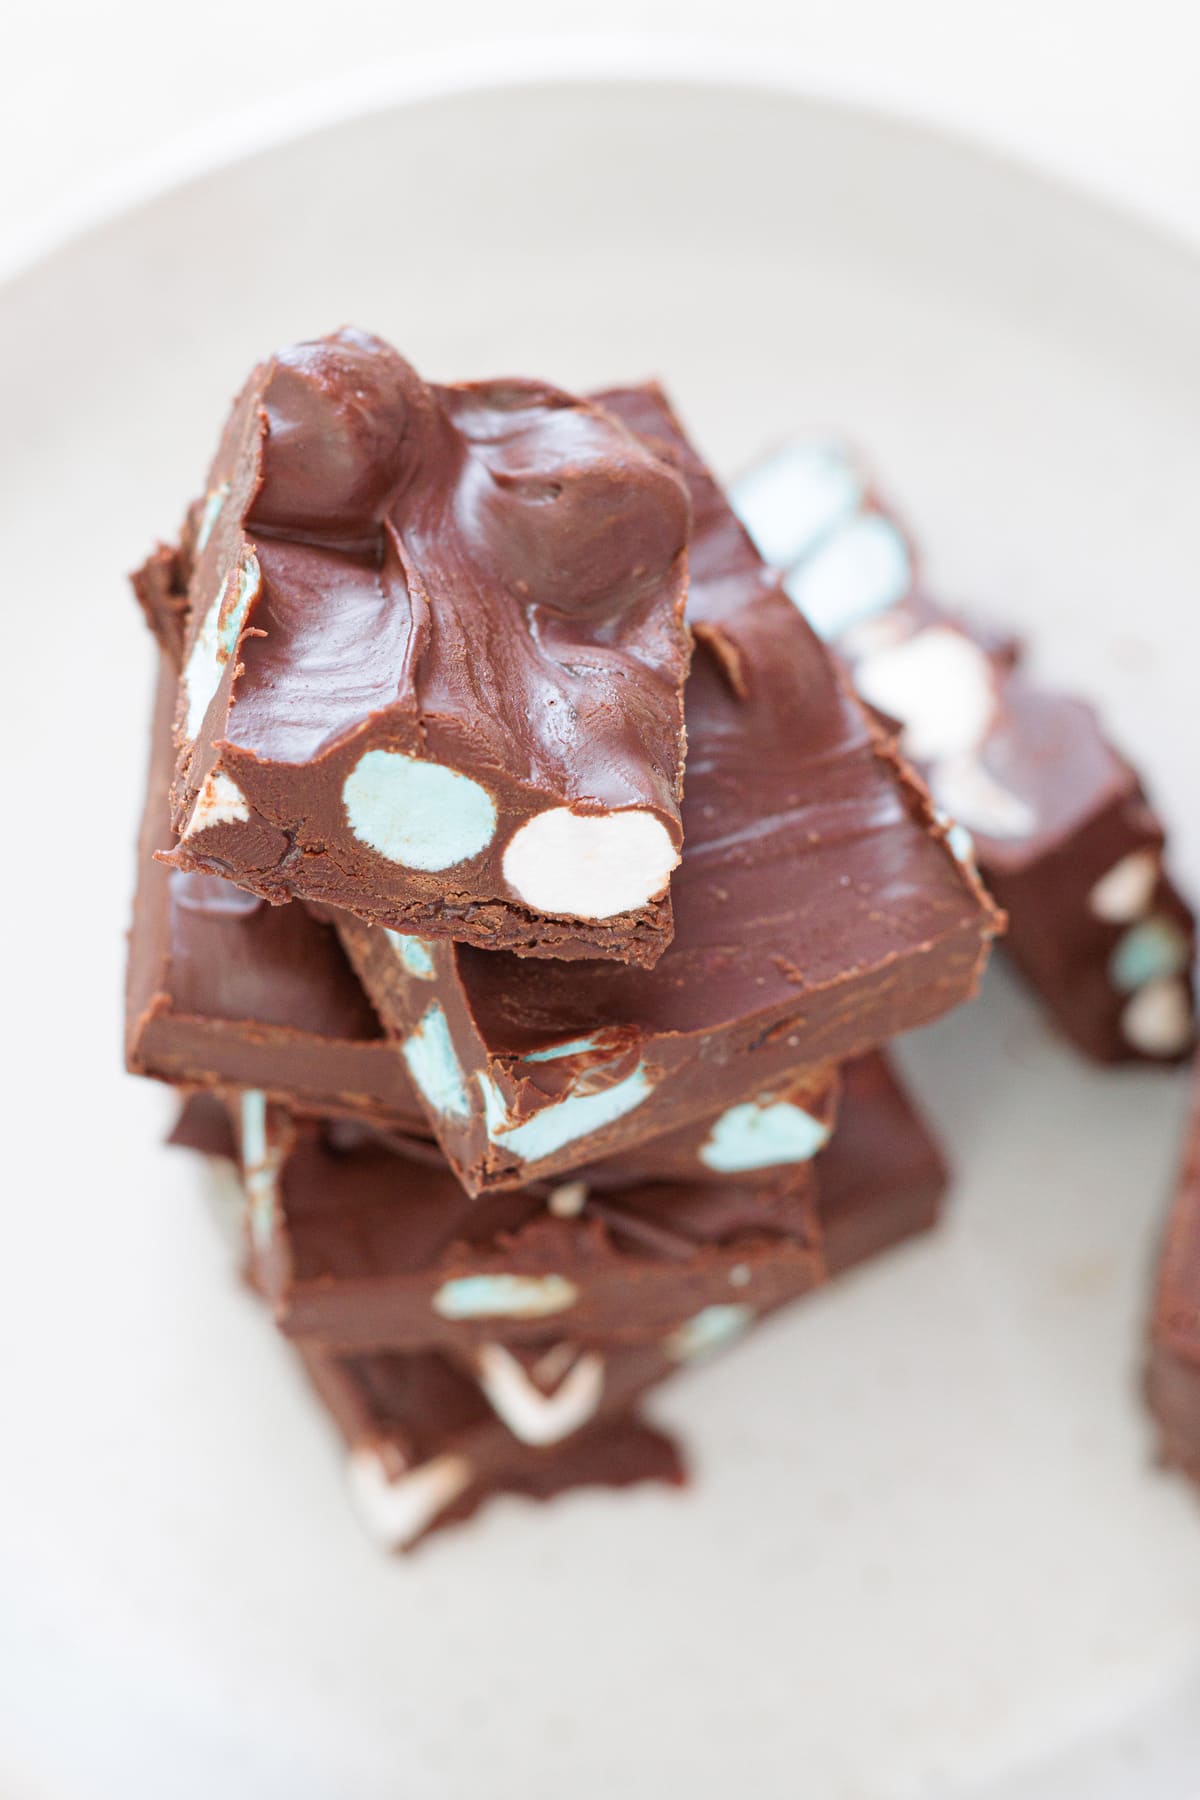
Stack of Chocolate Fantasy Bars highlighting the colorful marshmallows inside.
I honestly can’t believe it took me this long to share this recipe because it’s one of the easiest, most fun treats we make. It’s literally melt, mix, and you’re done. No baking, no fuss, nothing fancy. These are also hilarious to make with kids because they can dump, stir, taste-test… and there’s basically nothing they can mess up, haha!
And of course, you know I can’t forget Claudia (my cousin with a gluten intolerance)! These bars are naturally gluten-free because most of the ingredients don’t contain gluten to begin with. What you really need to watch for is cross-contamination.
A lot of marshmallows, chocolate chips, and caramel sauces are made in facilities that also process gluten. So just choose certified gluten-free versions to be safe. Everything I mention in the ingredient notes is gluten-free.
We also like to switch things up sometimes, and I've added our favorite little twists at the end of the article if you want to try something fun. And if you love easy desserts like this, you’ll definitely want to try my 4-Ingredient White Chocolate Pretzel Bark, it's another mix-and-chill holiday staple around here!
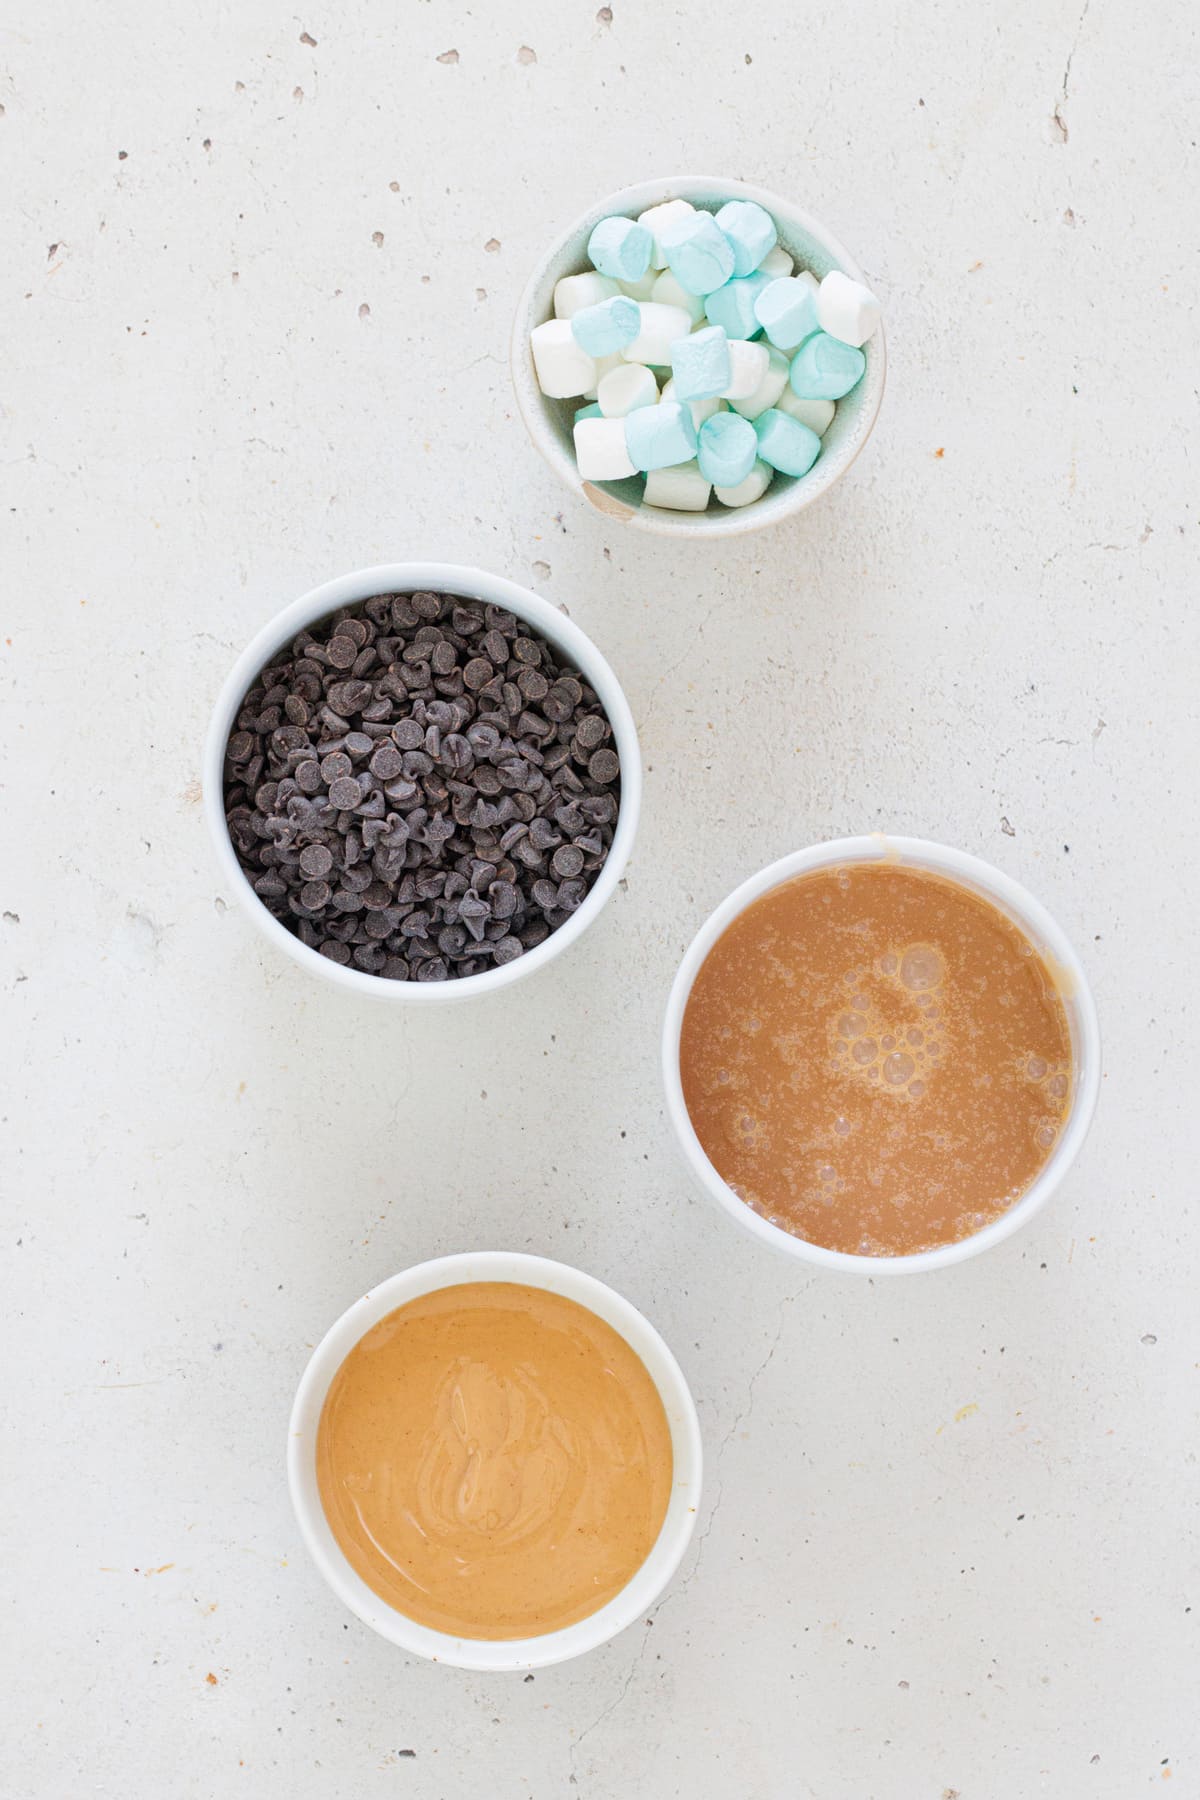
What You'll Need
I usually cut these into small 1½-inch squares (aka bite-size) and get about 25 pieces from an 8×8 pan. I’ve tested a 9×9 pan too, but the bars came out way too thin, and the mini marshmallows were barely covered. So I definitely recommend sticking with the 8×8 for the best results!
If you prefer bigger squares, you can cut them into 2-inch pieces and get about 16 bars, but those are a bit too big for us, so we usually keep them bite-sized.
Ingredients for 5 Minute Fantasy Bars
1 ½ cups dark chocolate chips (250 g) - I usually go with dark chocolate because it keeps the bars from becoming overly sweet. My favorite is Enjoy Life Dark Chocolate Morsels. They melt beautifully and give the bars the smoothest finish. They’re also vegan, gluten-free, dairy-free, and nut-free, which makes them a great option for almost any recipe.
½ cup caramel sauce (140 g) - I like to use a thick, buttery caramel sauce. Thin caramel tends to disappear into the chocolate. I love Trader Joe’s Fleur de Sel Caramel Sauce because it melts evenly and sets with the perfect chewy texture. Homemade caramel works great too, as long as it’s not too runny.
½ cup creamy peanut butter (100 g) - I recommend creamy peanut butter; it’s what gives these bars that silky texture. I’ve tested this with both natural peanut butter and the typical creamy kind, and the creamy version wins every time. Natural peanut butter makes the chocolate mixture a little too oily and inconsistent.
5 cups mini marshmallows (300 g) - I’ve used both name-brand and store-brand marshmallows, and they all work the same as long as they’re fresh and soft. Stale marshmallows don’t melt the same way and can make the bars slightly rubbery.
Four ingredients and five minutes… it really doesn’t get easier than this! Now let me show you exactly how I make these delicious Fantasy Bars.
I recommend reading through the whole recipe first because I share a few tips that help you get the perfect texture. They’re all mistakes I’ve made myself, and they were surprisingly easy to avoid, oops!
How To Make My 5 Minute Fantasy Bar
I start by adding the dark chocolate chips and creamy peanut butter to a medium heatproof bowl. Using the double-boiler method, I mix until it melts to a silky and smooth texture. This method gives me full control over the heat and helps prevent the chocolate from overheating or turning grainy.
You can also melt it in the microwave using 30-second intervals, stirring well between each one. But be careful because dark chocolate burns fast, and once it burns, there’s no saving it! Been there too many times, which is exactly why I prefer using the stovetop.
Let it cool down for about 3 minutes and then fold in the mini marshmallows. It should still be warm to the touch but not hot enough to burn your finger. This way the marshmallows stay whole, giving the bars their classic pockets of chewy texture. If the chocolate is too hot, they melt completely.
Add mini marshmallows to the melted chocolate and peanut butter.
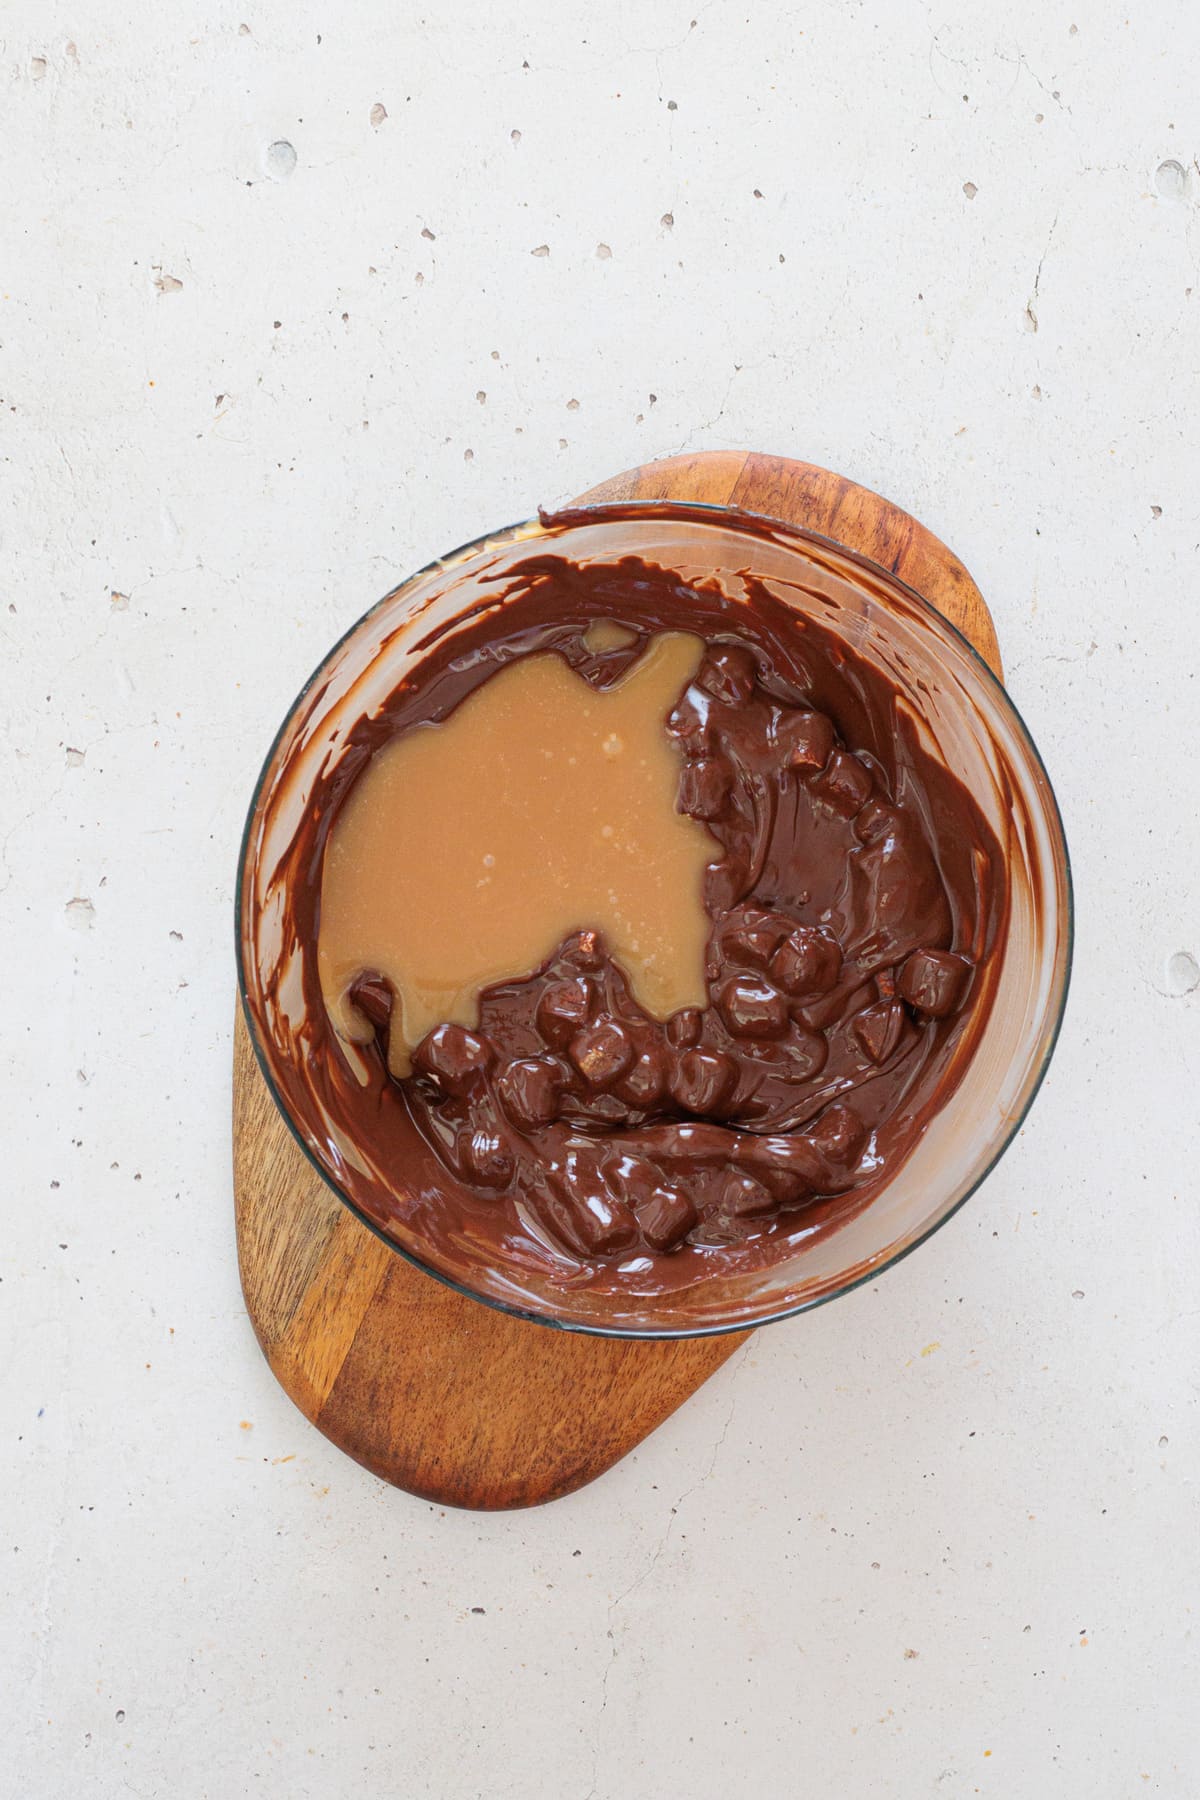
Now it’s time for the caramel sauce. I just pour it right over the marshmallow mixture and gently fold everything together. From here, it really comes down to personal preference because I've done both ways and both are pretty good.
I usually don't overmix and leave a few caramel swirls because it creates little ribbons of caramel that stand out in the bars and give each bite a fun surprise. The texture stays slightly layered, and you get those chewy pockets of caramel, that look beautiful when sliced, which I personally prefer.
But, I've also blended everything into one uniform mixture and that version turns out smoother, denser, and more fudge-like. The caramel flavor becomes evenly distributed, so every bite tastes the same instead of having caramel bursts. It also slices very cleanly once chilled. If you prefer a more classic fudge-style bar, you’ll probably prefer this version.
Pour the caramel sauce into the chocolate mixture.
To make it easier to lift and slice the bars later, I line an 8×8 inch dish with parchment paper. Trust me, don't skip it. I’ve skipped the parchment before, and I ended up having to literally chisel the bars out with a knife. Never again. It tasted good, just definitely not sliceable. It was more like a soft bark bar, haha.
I then pour and spread the mixture into the lined pan and press it gently with a spatula to make the top even. Don’t press down too firmly, just enough to level the surface without pushing the marshmallows to the bottom. Pressing too hard compacts the mixture and makes the bars dense instead of fudge-like.
Press the mixture evenly into the parchment-lined pan.
Now comes the hard part… waiting. I refrigerate the bars for at least two hours, or until they’re completely set. I’ve tried freezing them to speed things up, but it slightly changes the texture. It ended up a bit firmer and not as creamy. The fridge really gives the best result: firm but still creamy.
Once the block is firm, I lift it out using the parchment and, using a sharp knife, I slice it into even squares. I usually store them in an airtight container in the fridge because they hold their shape and texture better when chilled. They stay fresh for at least 3 days. Longer than that, I don't know because they’ve never lasted that long, haha!
A close-up of sliced 5 Minute Fantasy Bars with their creamy chocolate texture.
And that's it! They're ready to eat. Look at how creamy they are (you can actually tell from the photo!). These are great for potlucks, picnics, movie nights, or after-dinner treats. They taste like a cross between fudge and rocky road, but softer and silkier.
This is actually one of our go-to treats when we want something sweet without spending an hour in the kitchen! If you do want to turn the oven on, Rita’s Christmas Crack is the fastest bake we make all season, less than 30 minutes and dangerously good.
Easy Variations You Can Try
I’ve made these Fantasy Bars so many times that we’ve ended up testing a few fun variations along the way. The classic version is still my go-to, but here are a few tweaks I also make:
Sea salt on top: If you’ve never added flaky sea salt to chocolate before, try it at least once! No, it's not going to ruin the recipe. It brings out the caramel flavor in a way that surprised me the first time I tested it. This is actually my second favorite version, right after the classic.
Add chopped nuts: Rita is all about the crunch in recipes, so I fold in a small handful of chopped walnuts or pecans. It changes the texture just enough without taking away from the creamy base. This is the version she asks for most often because it makes the bars feel a little richer and more "grown up."
Half dark, half milk chocolate: Not everyone is a fan of dark chocolate, so I also make this one quite often! The mix of chocolates helps the bars melt a little smoother, but the main difference is in texture and flavor. It's much softer and sweeter, but still balanced and nowhere near overly sweet.
These aren’t new recipes, just little tweaks we’ve enjoyed over time depending on what we have in the pantry or what we’re craving that week.
If you love easy, crunchy and no-bake treats like this, you’ll probably also love my Easy No-Bake Nut Goodie Bars. It has a chocolate base, creamy vanilla filling, and that crunchy nut topping Rita is obsessed with!
My Tips for the Best Results
This recipe is so easy that most of it comes together without much thought, but after making these Fantasy Bars more times than I can count, I’ve picked up a few habits that always give the best texture and flavor.
Melt the chocolate gently: For the past few months I keep burning chocolate in the microwave. I don’t know why, but every single time I try it, the chocolate overheats and seizes. So for now, I'm sticking with the classic double boiler method so I don't ruin any more chocolate. Plus, keeping the heat gentle gives you that silky, creamy base every time.
Let the chocolate cool slightly before adding marshmallows: This is the step that keeps the marshmallows whole instead of melting into the chocolate. Aim for warm, not hot. I always wait about 2 to 3 minutes.
Press gently, not firmly: Use just enough pressure to level the top. If you push too hard, you’ll compact the bars and lose that creamy, airy texture.
Chill, don’t freeze: I thought it was a good idea too, but it changes the texture and makes the bars a little firmer and less creamy. The fridge gives the best, most consistent results.
These are small details, but they really do make a difference!
Stacked 5 Minute Fantasy Bars showing the marshmallow-studded chocolate layers.
And that’s it, the easiest no-bake treat ever! I hope you love these little Fantasy Bars as much as we do. They’re the kind of recipe you make once and then immediately add to your "keep forever" list. And if you're looking for something pepperminty next, my 3-Ingredient Peppermint Bark Clusters are a holiday must that sets in under an hour!
If you try any of the fun twists at the end, let me know which one becomes your new favorite! Until then, enjoy your chocolatey, marshmallowy, peanut-buttery bites of joy. And don’t forget to share this recipe with someone who loves no-bake treats, they’ll thank you later.
Note: All product mentions are simply what I use in my own kitchen. None of the links are sponsored or affiliate.
These 5 Minute Fantasy Bars are a rich, no-bake chocolate treat made with just four ingredients. Fudge-like, naturally gluten-free, and swirled with peanut butter and mini marshmallows, they’re the perfect quick dessert for holidays, parties, or anytime you need something sweet fast.
Ingredients
1 ½cups dark chocolate chips (250 g)
½cup caramel sauce (140 g)
½cup creamy peanut butter (100 g)
5cups mini marshmallows (300 g)
Instructions
1
Prepare the panLine an 8×8 inch square pan with parchment paper, making sure it hangs over the sides for easy lifting later.
2
Melt the chocolate and peanut butterMelt gently using a double boiler (preferred) or in the microwave in 30-second bursts, stirring between each, until smooth and silky.
3
Let the mixture cool slightlyRemove from the heat and let the chocolate mixture cool for about 2–3 minutes. It should be warm to the touch, not hot.
4
Fold in the marshmallowsAdd the mini marshmallows and gently fold until they’re evenly coated in the chocolate mixture.
5
Add the caramelPour in the caramel sauce and fold lightly to create caramel swirls. For a more fudge-like bar, you can mix a bit more until mostly combined.
6
Press into the panTransfer the mixture to the prepared pan. Use a spatula to spread it out and press it gently into an even layer (don’t pack it too firmly or the bars will be dense).
7
Chill until setRefrigerate for about 2 hours, or until completely firm.
8
Slice and serveLift the slab out of the pan using the parchment. Cut into small 1½-inch squares (about 25 pieces) and enjoy. Store leftovers in an airtight container in the fridge for up to 3 days.
Nutrition Facts
Servings 25
Amount Per Serving
Calories130kcal
% Daily Value *
Total Fat5.5g9%
Saturated Fat2.5g13%
Cholesterol5mg2%
Sodium40mg2%
Potassium100mg3%
Total Carbohydrate19g7%
Dietary Fiber1g4%
Sugars13g
Protein2g4%
* Percent Daily Values are based on a 2,000 calorie diet. Your daily value may be higher or lower depending on your calorie needs.
Rita Dias
Food Blogger
Hi, I'm Rita, a full-time food blogger, mom of two beautiful cats, and passionate about cooking and photography. I want to share with you simple but delicious recipes that I make in my own kitchen.