I feel like this recipe should come with a warning. Not because it’s complicated, but because once you realize how easy it is, you’ll find yourself making it way too often.
It started as one of those “I just want something sweet” moments… There was no plan. Definitely no intention of baking. Just a few ingredients, very low effort, and a bit of curiosity to see if this would even work.
You crush, melt, mix, press… and then you wait. No oven, no stress, no point where you question your life choices. At that stage, I wasn’t expecting much. Something sweet, something chocolatey, maybe a little messy...
But then they set. I cut into them expecting chaos… and instead got clean squares, a slight crunch on top, a soft, chewy middle, and that peppermint kick that somehow makes it all feel a bit more put together than it has any right to be.
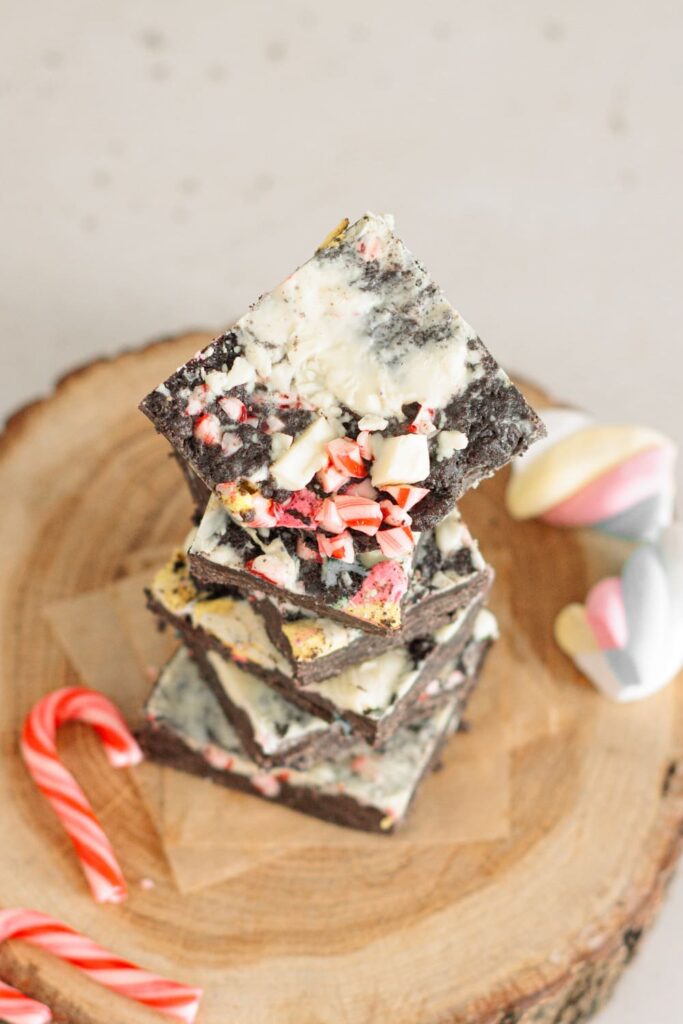
4-ingredient Peppermint Oreo Bars
They come together quickly and disappear faster than anything else on the table.
Which is exactly why I said this should come with a warning.
Ingredients for My Peppermint Oreo Bars
If you’re looking for something subtle… this is not it. But if what you want is something easy that people immediately go back for, this is exactly that.
No oven, minimal effort, and a slightly dangerous amount of Oreos.
And once you see the ingredients, it’ll make sense why it works so well!
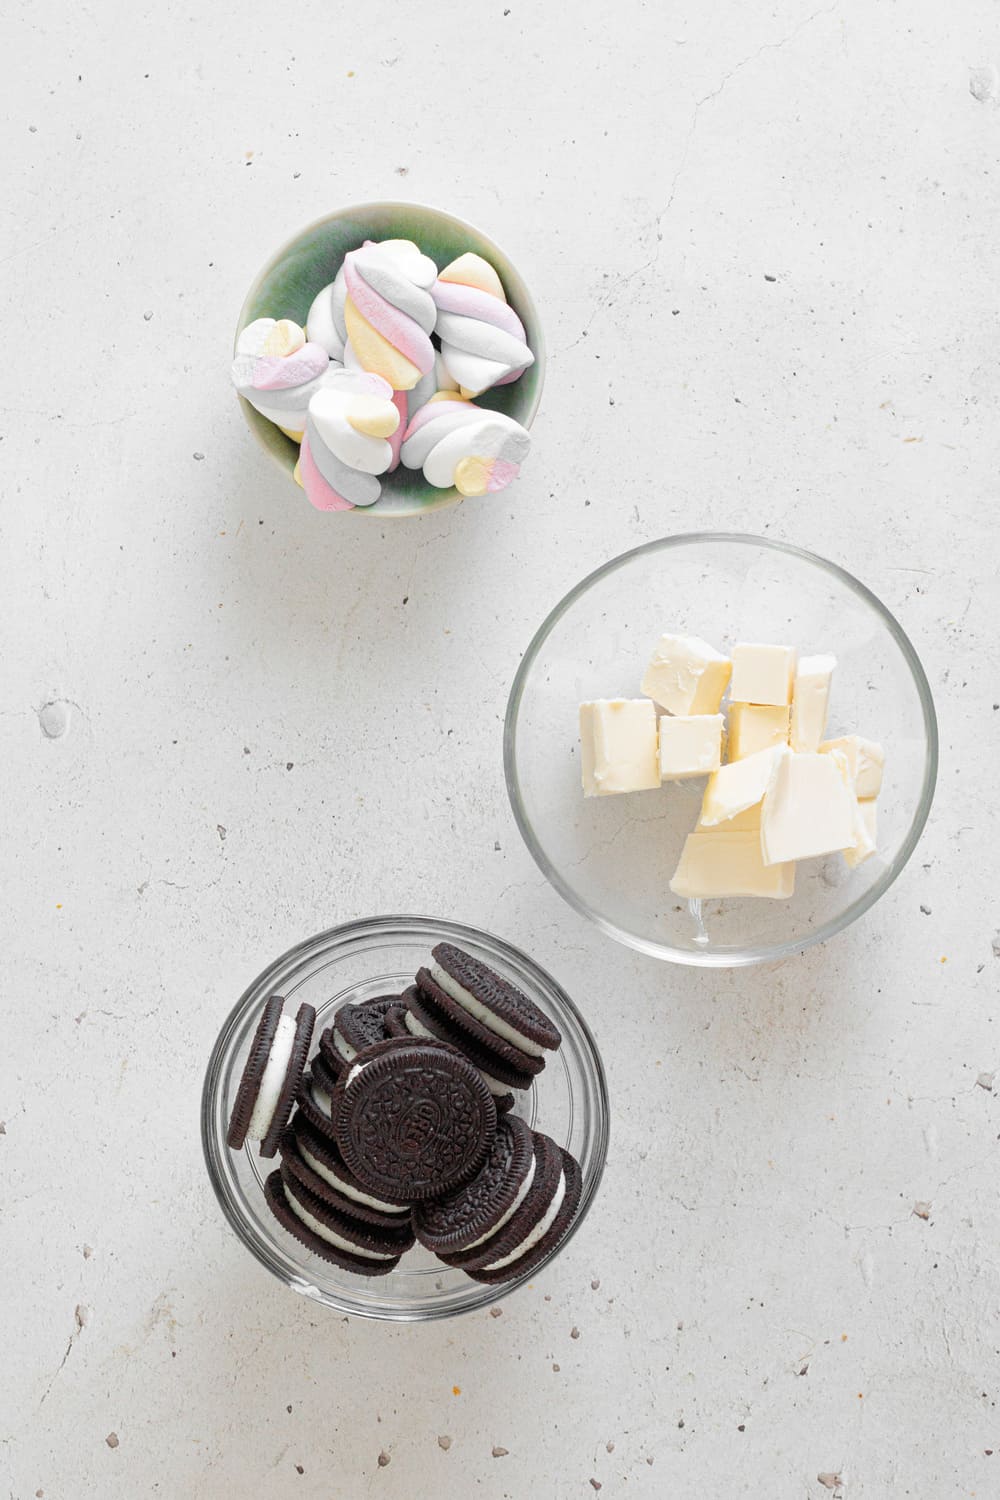
Ingredients for the Peppermint Oreo Bars with white chocolate and candy cane topping
320 g Oreo cookies (whole, with filling) – The base of everything. I like leaving a few chunks for texture instead of fully crushing them into powder.
4 tbsp unsalted butter (60g) – Helps melt the marshmallows smoothly and adds richness. Make sure it’s fully melted and smooth before mixing.
10 large marshmallows – These are what bind everything together and give that chewy texture.
¼ cup white chocolate, chopped (60g) – Adds a creamy contrast on top. No need to melt beforehand.
4 peppermint candy canes, crushed – For that crunch and fresh peppermint flavor. Adjust to taste if you prefer it milder.
Using these ingredients, I usually get about 12 to 16 squares, depending on how big you cut them.
And if you feel like changing things up, you can easily switch the flavor. Skip the peppermint and use things like crushed pretzels, toasted nuts, or even peanut butter chips. Same base, completely different result.
How To Make My 4-Ingredient Peppermint Oreo Bars
Start by lining a 20×20 cm (8×8 inch) pan with parchment paper, leaving some overhang so you can lift everything out later.
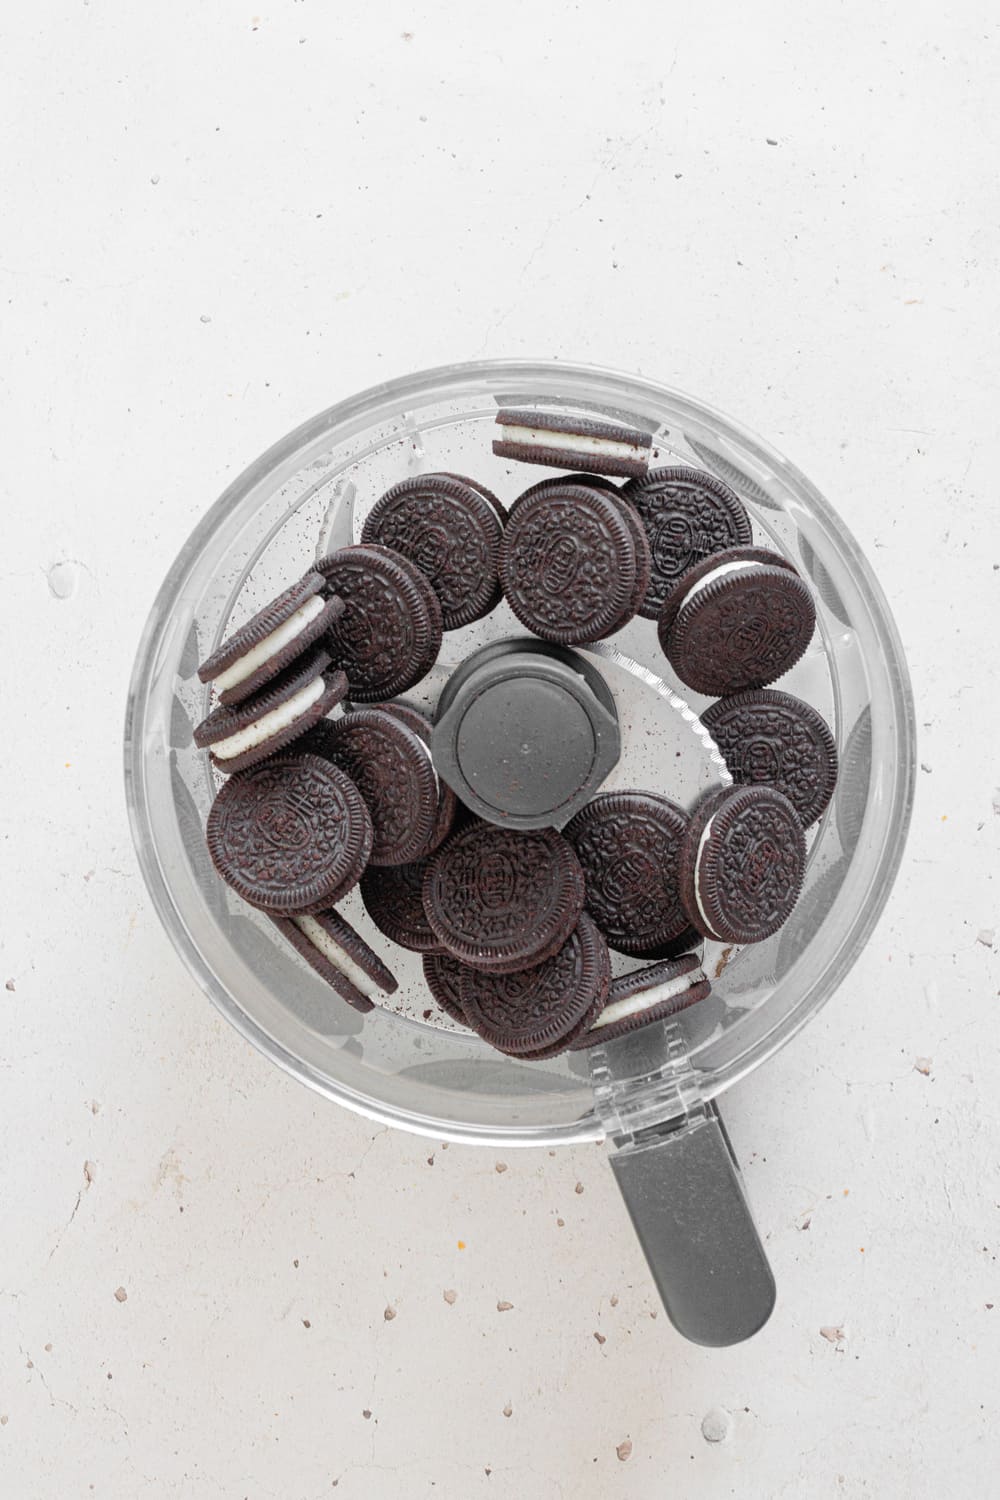
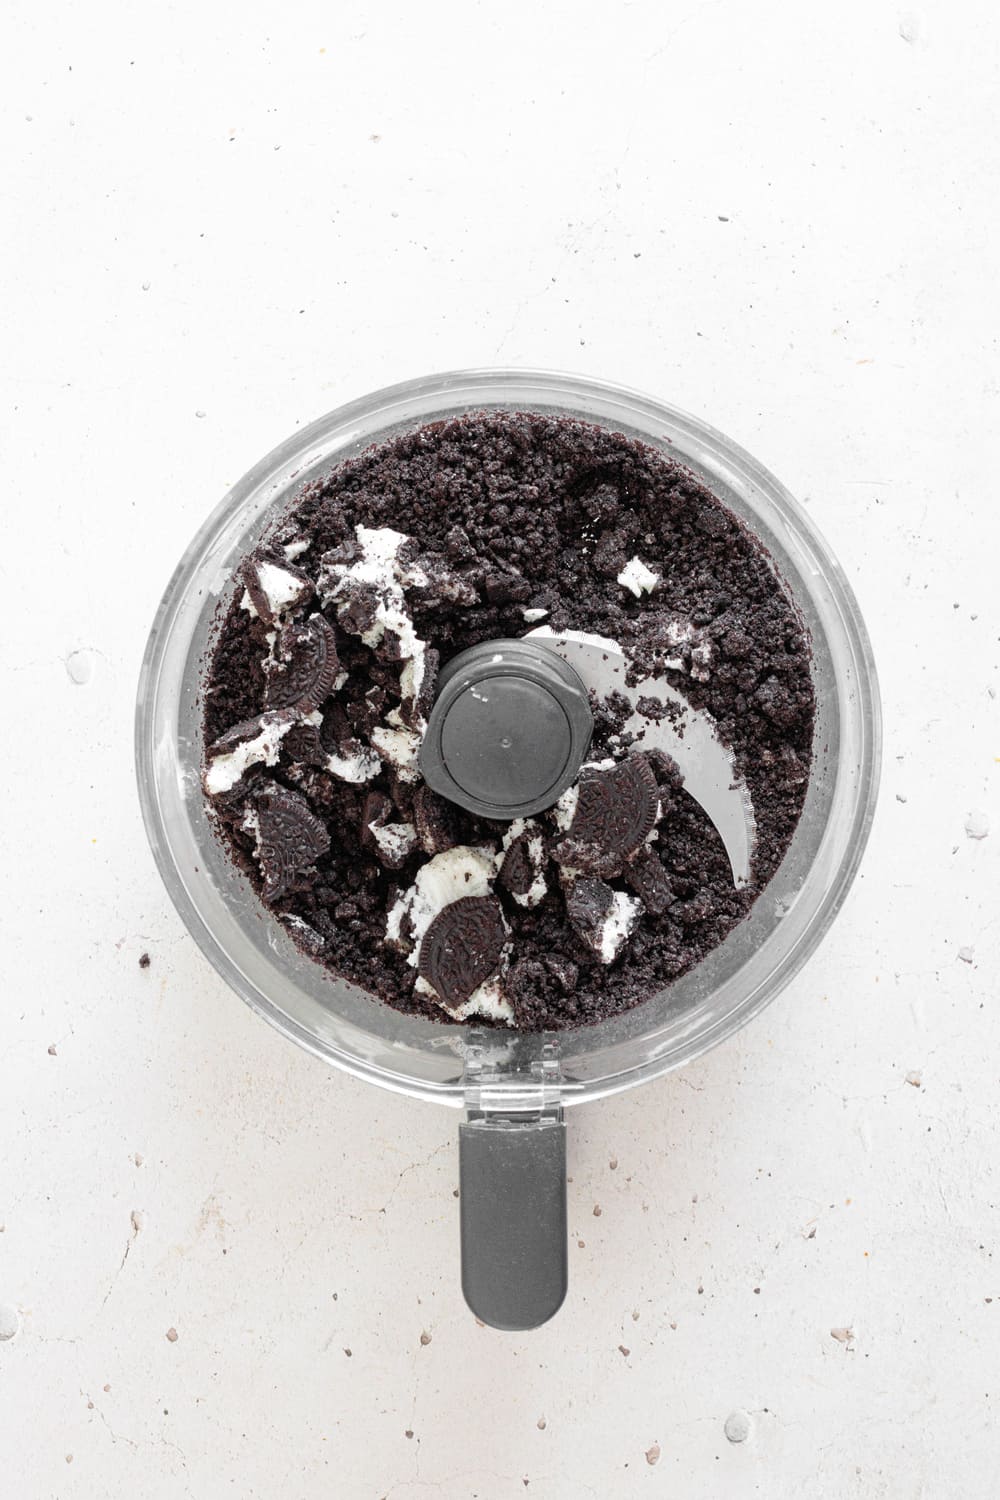
Add the Oreos to a food processor and pulse until you get fine crumbs with a few small chunks. Don’t over-process the Oreos. A bit of texture makes these much better. Once you have your crushed Oreos, set them aside.
Add the Oreos to a food processor.
Pulse until you get fine crumbs with a few small chunks.
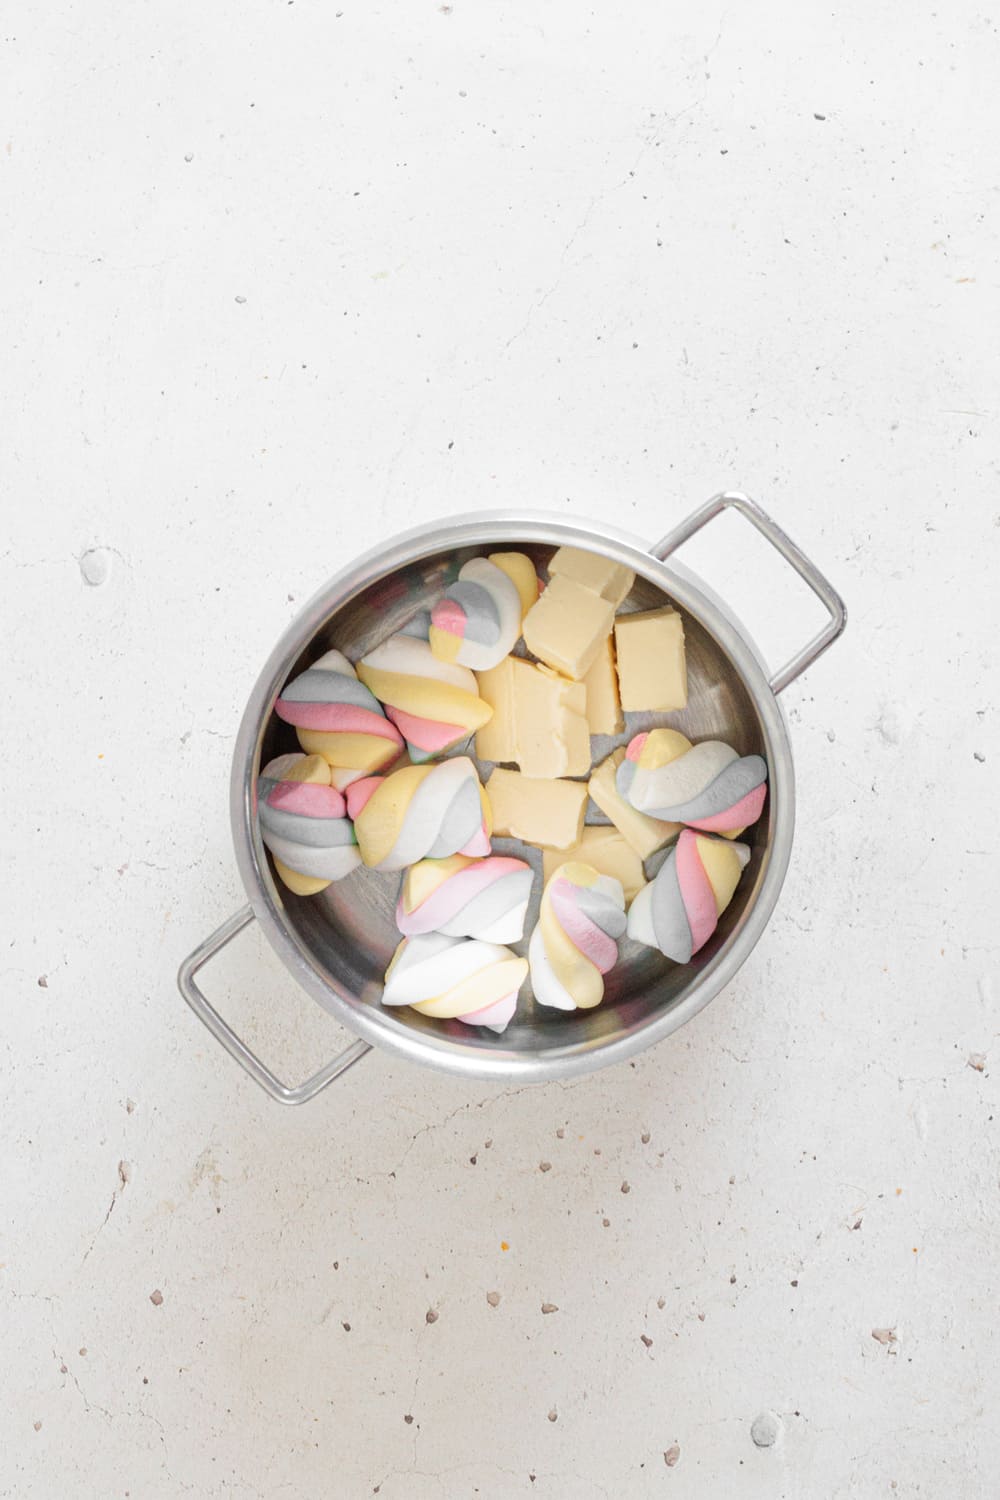
In a microwave-safe bowl, combine the marshmallows and butter. Microwave for 1 to 2 minutes, stirring halfway through, until fully melted and smooth. (You can also do this on the stove over low heat, just keep stirring.)
Pour the melted mixture over the crushed Oreos and mix quickly. It will set faster than you think, so just keep folding until everything is evenly coated. If the mixture sticks to your spoon or hands, lightly grease them, it makes shaping much easier.
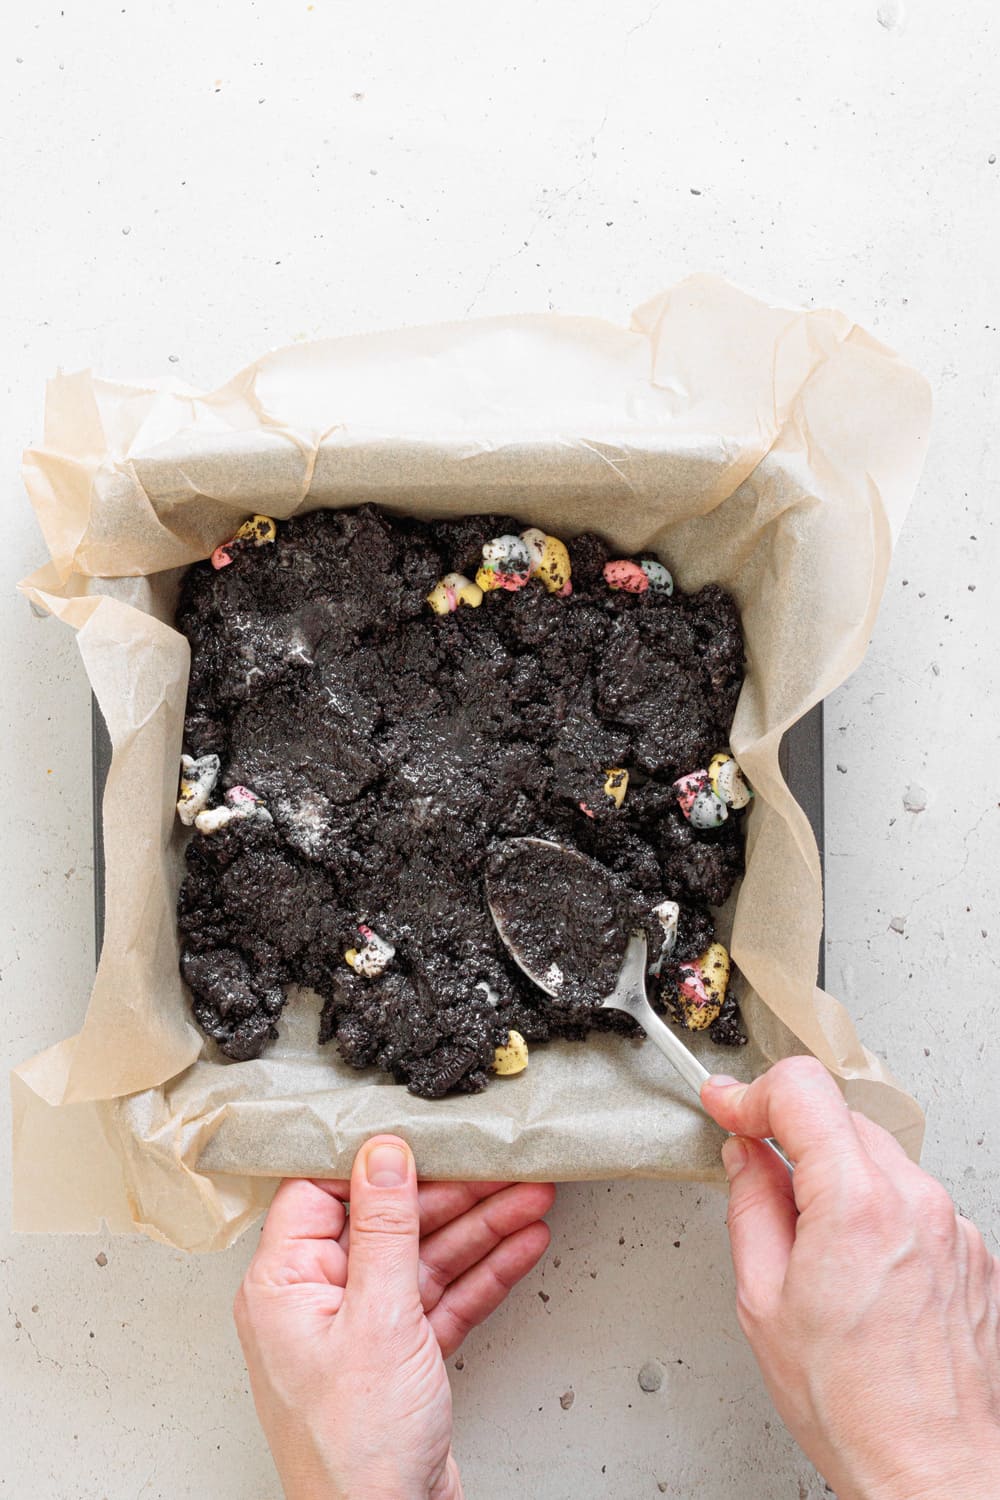
Transfer the Oreo mixture into your prepared pan and press it down firmly into an even layer. This helps the bars hold together cleanly when you cut them!
Microwave the marshmallows and butter for 1 to 2 minutes.
Press the mixture firmly into your prepared pan to make an even layer.
Sprinkle the chopped white chocolate and crushed candy canes over the top. Don’t press too much, just enough for them to stick.
Let it set at room temperature for about 1–2 hours, or speed it up by refrigerating for about 20 minutes, then letting it come back to room temperature before cutting.
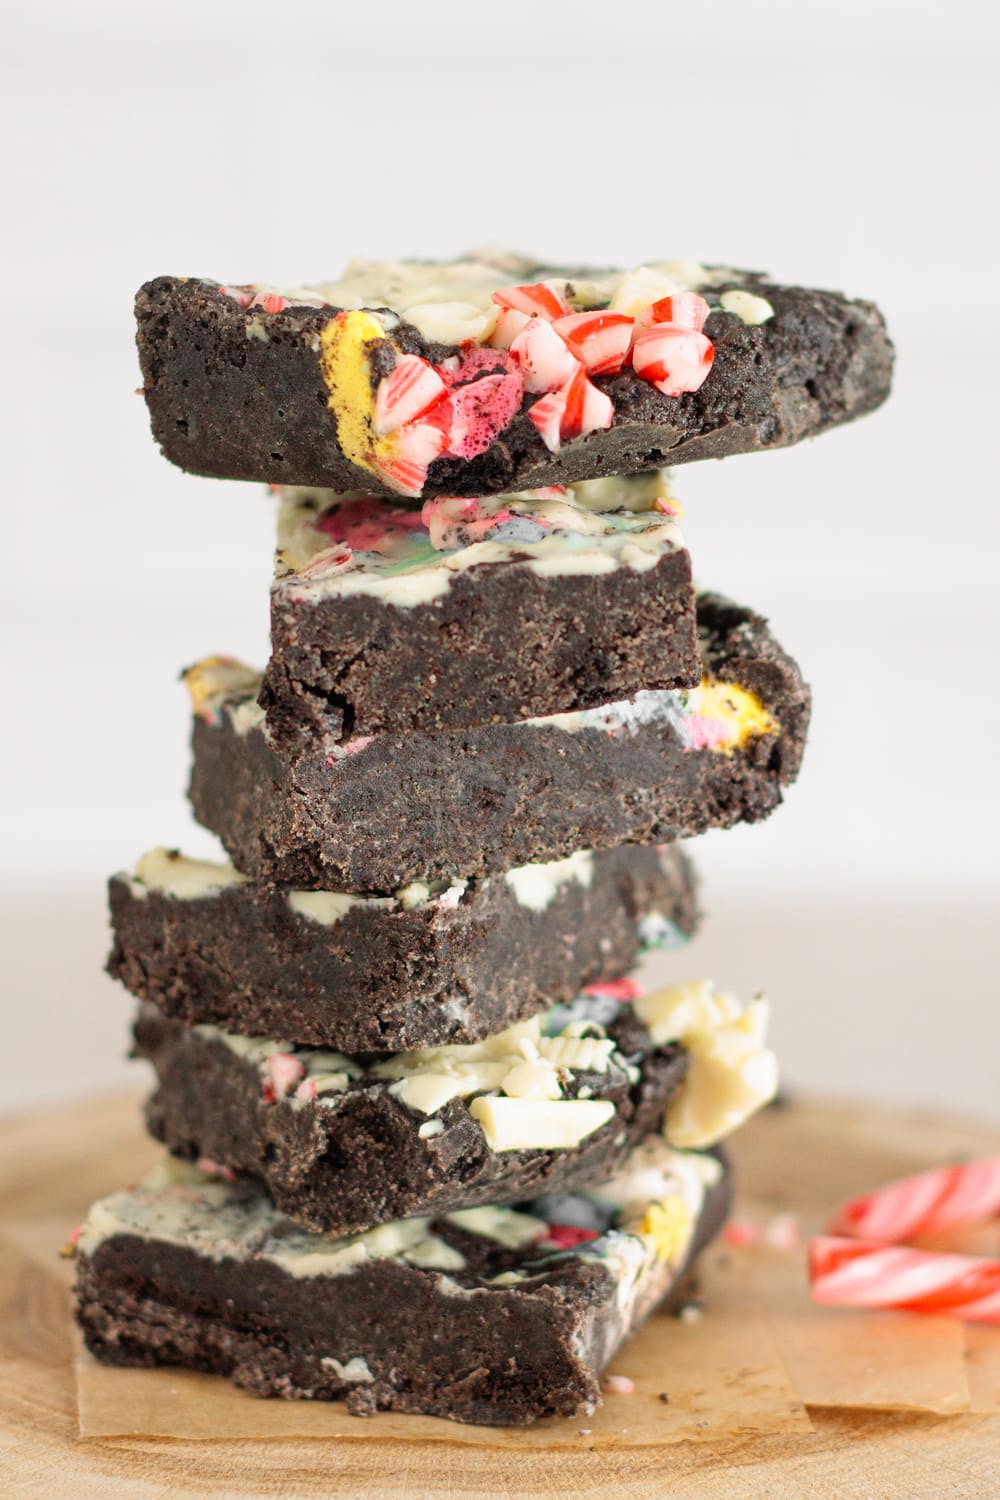
My 4-ingredient Peppermint Oreo Bars with white chocolate topping
Yes, and you should. No baking, no last-minute stress, and they actually look like you put in way more effort than you did.
They hold their shape well once set and keep perfectly for a couple of days in an airtight container.
Room temperature works best. If you refrigerate them, just let them sit out for a few minutes before serving so they soften slightly.
Freezing works too, but the peppermint can become slightly stronger after thawing.
Please Don’t Just Cut These Into Squares
I mean… you can cut them into neat squares and call it a day.
But once I started playing around with these, I realized they’re much more fun when you don’t treat them like a proper, well-behaved dessert.
Crumble them over vanilla ice cream - This is probably my favorite. It turns a simple scoop into something you’d definitely order if you saw it on a menu.
Break them instead of slicing them - Slightly chaotic, but way more fun. And for some reason, it makes going back for “just one more” feel completely justified.
Use them as a base - Press them down a bit thinner, add whipped cream or chocolate on top, and suddenly it looks like you had a plan all along.
Turn them into ice cream sandwiches - Two pieces, a scoop in the middle, a little time in the freezer… not the cleanest thing you’ll eat, but easily one of the best.
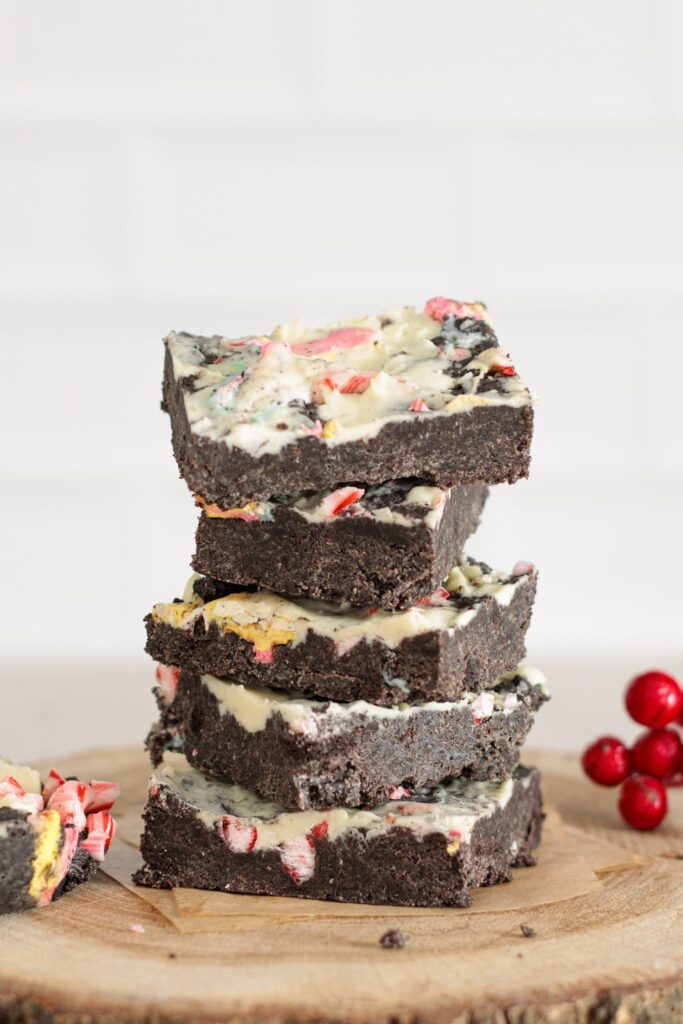
4-ingredient Peppermint Oreo Bars with white chocolate topping
This is one of those recipes that’s almost better when you stop treating it like a finished product!
These 4-Ingredient Peppermint Oreo Bars are rich, chewy, and just a little crunchy on top. Made with crushed Oreos, melted marshmallows, and finished with white chocolate and peppermint, they come together quickly without needing an oven. Simple, slightly indulgent, and surprisingly hard to stop eating.
Ingredients
36 Oreo cookies (about 320g | whole, with filling)
4tablespoons unsalted butter (60g)
10 large marshmallows
½cup white chocolate (about 60g | chopped)
4 peppermint candy canes (crushed)
Instructions
1
Prepare the pan
Line an 8×8-inch (20×20 cm) baking dish with parchment paper, leaving some overhang to make it easier to lift out later.
2
Crush the Oreos
Add the Oreo cookies to a food processor and pulse until they form mostly fine crumbs. I like to leave a few small chunks for texture.
3
Melt marshmallows and butter
In a microwave-safe bowl, combine the marshmallows and butter. Microwave for 1–2 minutes, stirring halfway through, until fully melted and smooth. (You can also do this on the stove over low heat, stirring constantly.)
4
Mix everything together
Pour the melted marshmallow mixture over the crushed Oreos and mix quickly until everything is evenly coated. The mixture will become thick and sticky.
5
Press into the pan
Transfer the mixture into the prepared pan and press it down firmly into an even layer using a spatula or the back of a spoon.
6
Add the topping
Sprinkle the chopped white chocolate and crushed candy canes evenly over the top. The heat from the base will soften the chocolate slightly, which is exactly what you want.
7
Let it set
Let the bars set at room temperature for about 1–2 hours. If you’re short on time, refrigerate for about 20 minutes, then let them come back to room temperature before cutting.
8
Slice and serve
Lift the mixture out using the parchment paper and cut into squares or bars.
Nutrition Facts
Servings 14
Amount Per Serving
Calories21kcal
% Daily Value *
Total Fat10g16%
Saturated Fat6g30%
Cholesterol20mg7%
Sodium120mg5%
Potassium90mg3%
Total Carbohydrate28g10%
Dietary Fiber1g4%
Sugars20g
Protein2g4%
* Percent Daily Values are based on a 2,000 calorie diet. Your daily value may be higher or lower depending on your calorie needs.
Rita Dias
Food Blogger
Hi, I'm Rita, a full-time food blogger, mom of two beautiful cats, and passionate about cooking and photography. I want to share with you simple but delicious recipes that I make in my own kitchen.